Getting started with your free Unravel account has never been easier!
** DO NOT REMOVE Hidden Margin Required **
** DO NOT REMOVE Hidden Margin Required **
Bring Unravel to life by connecting your telemetry data
For you to get value from your free Standard Plan account, we need access to your telemetry data. This guide provides instructions on how to connect a Snowflake account to your Unravel account. The real-time connection allows you to access all Unravel features at once, perform real-time monitoring, receive notification alerts, and observe live insights without any requirement for account admin access.
Review our Privacy & Security FAQs for details on how your telemetry data is correlated within Unravel.
** DO NOT REMOVE Hidden Margin Required **
** DO NOT REMOVE Hidden Margin Required **
** DO NOT REMOVE Hidden Margin Required **
** DO NOT REMOVE Hidden Margin Required **
** DO NOT REMOVE Hidden Margin Required **
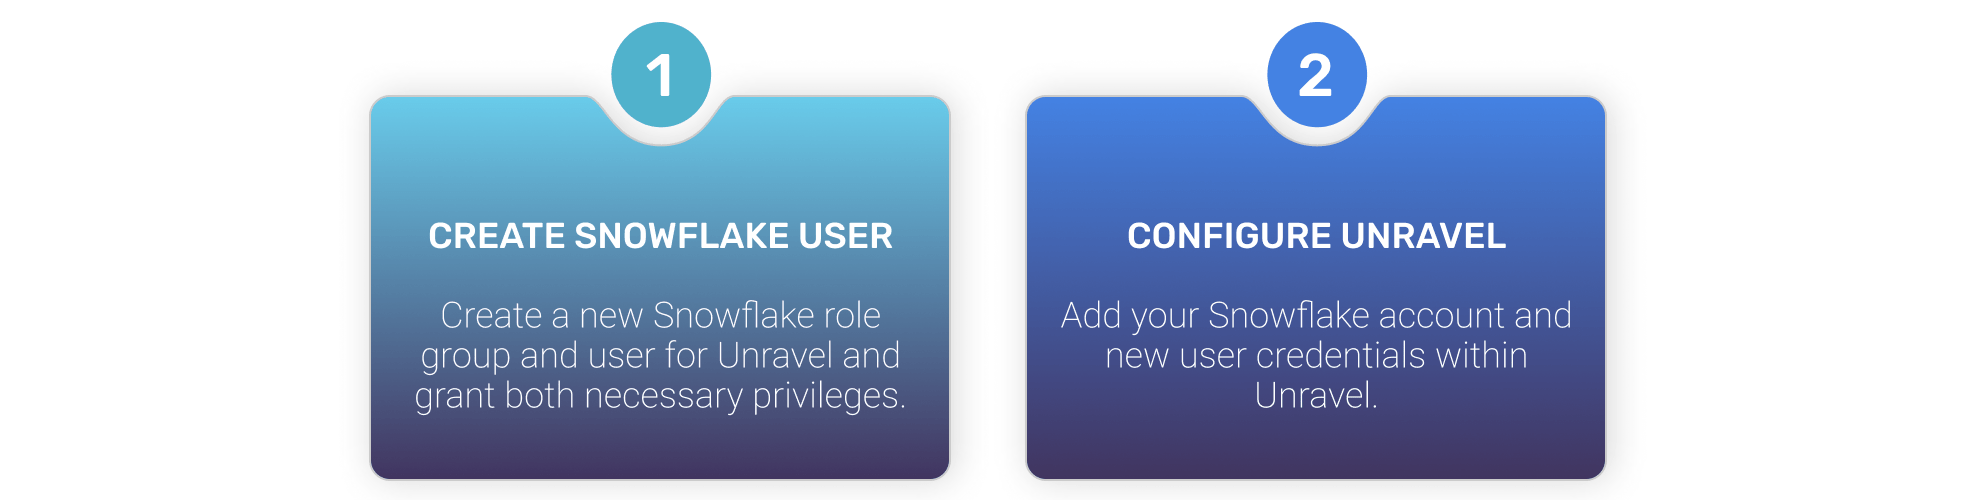
CREATE SNOWFLAKE USER
Step 1: Create a new Unravel role group and user within Snowflake
In this step is to create a new role group and user within your Snowflake account for Unravel, then grant the new role necessary privileges so Unravel can fetch telemetry data and query execution details. (Required for the next step.)
WHAT YOU NEED
Administrator-level access to your Databricks workspace. Note, you’ll need this for Step 2 as well.
** DO NOT REMOVE Hidden Margin Required **
** DO NOT REMOVE Hidden Margin Required **
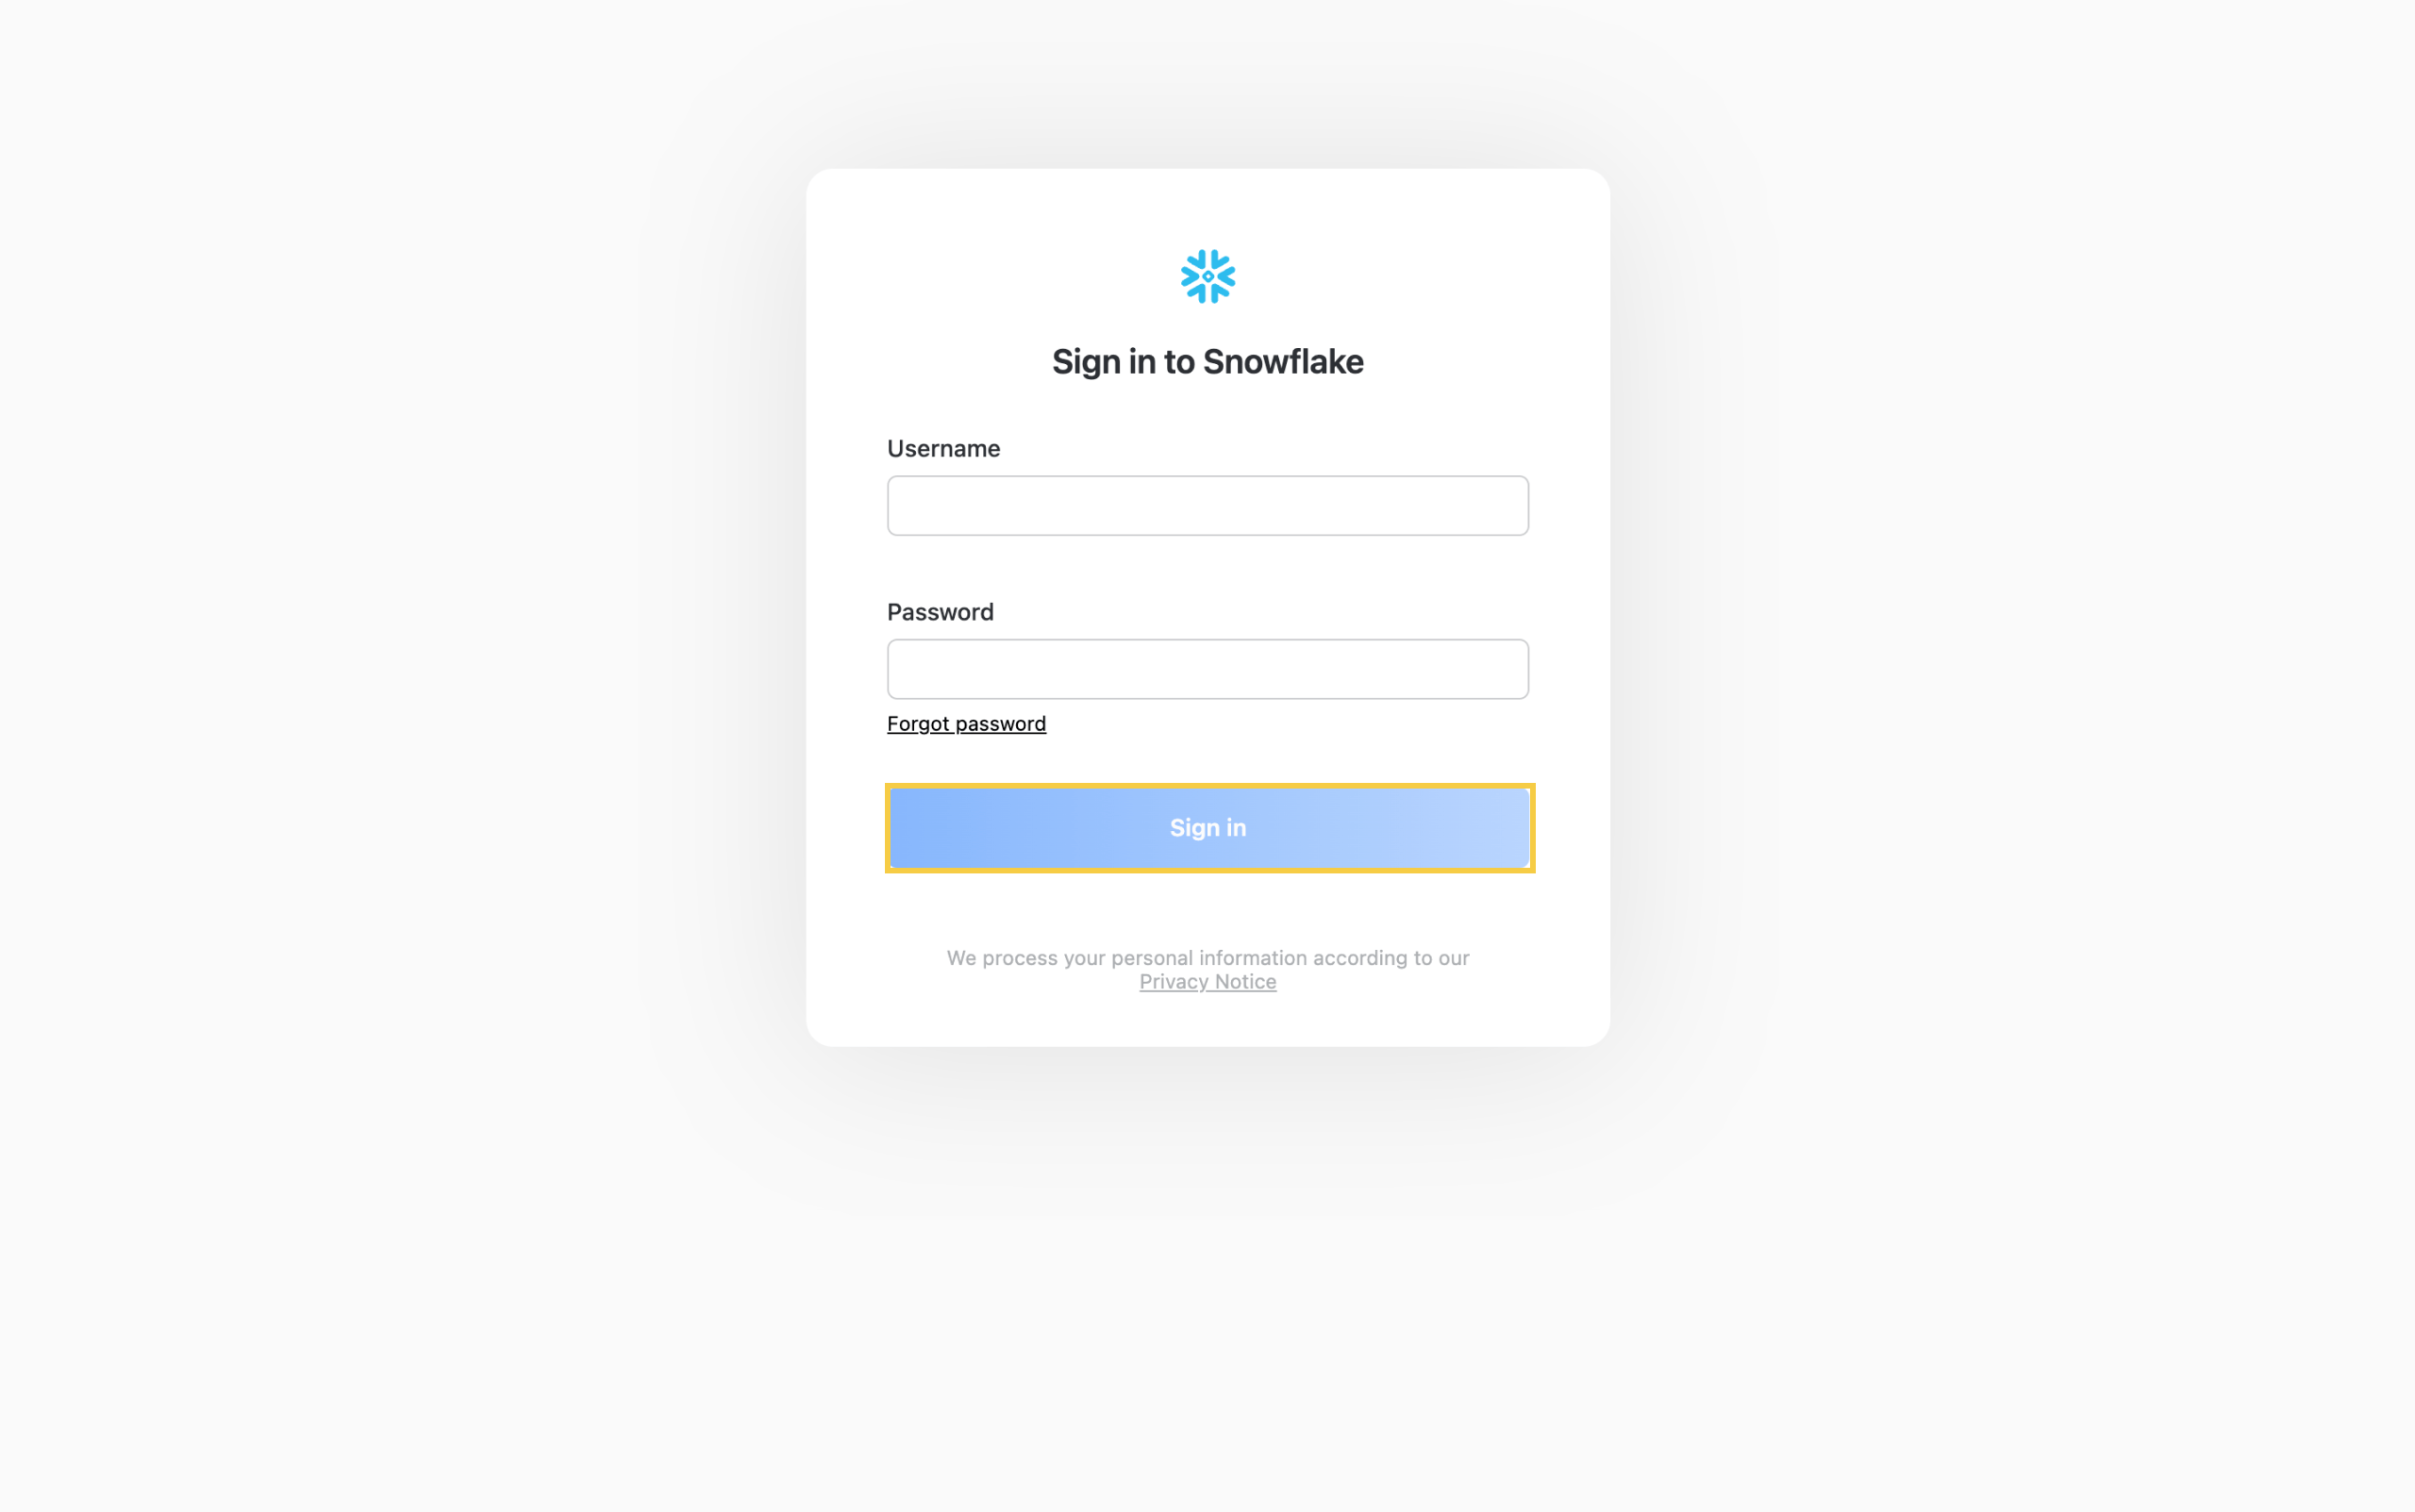
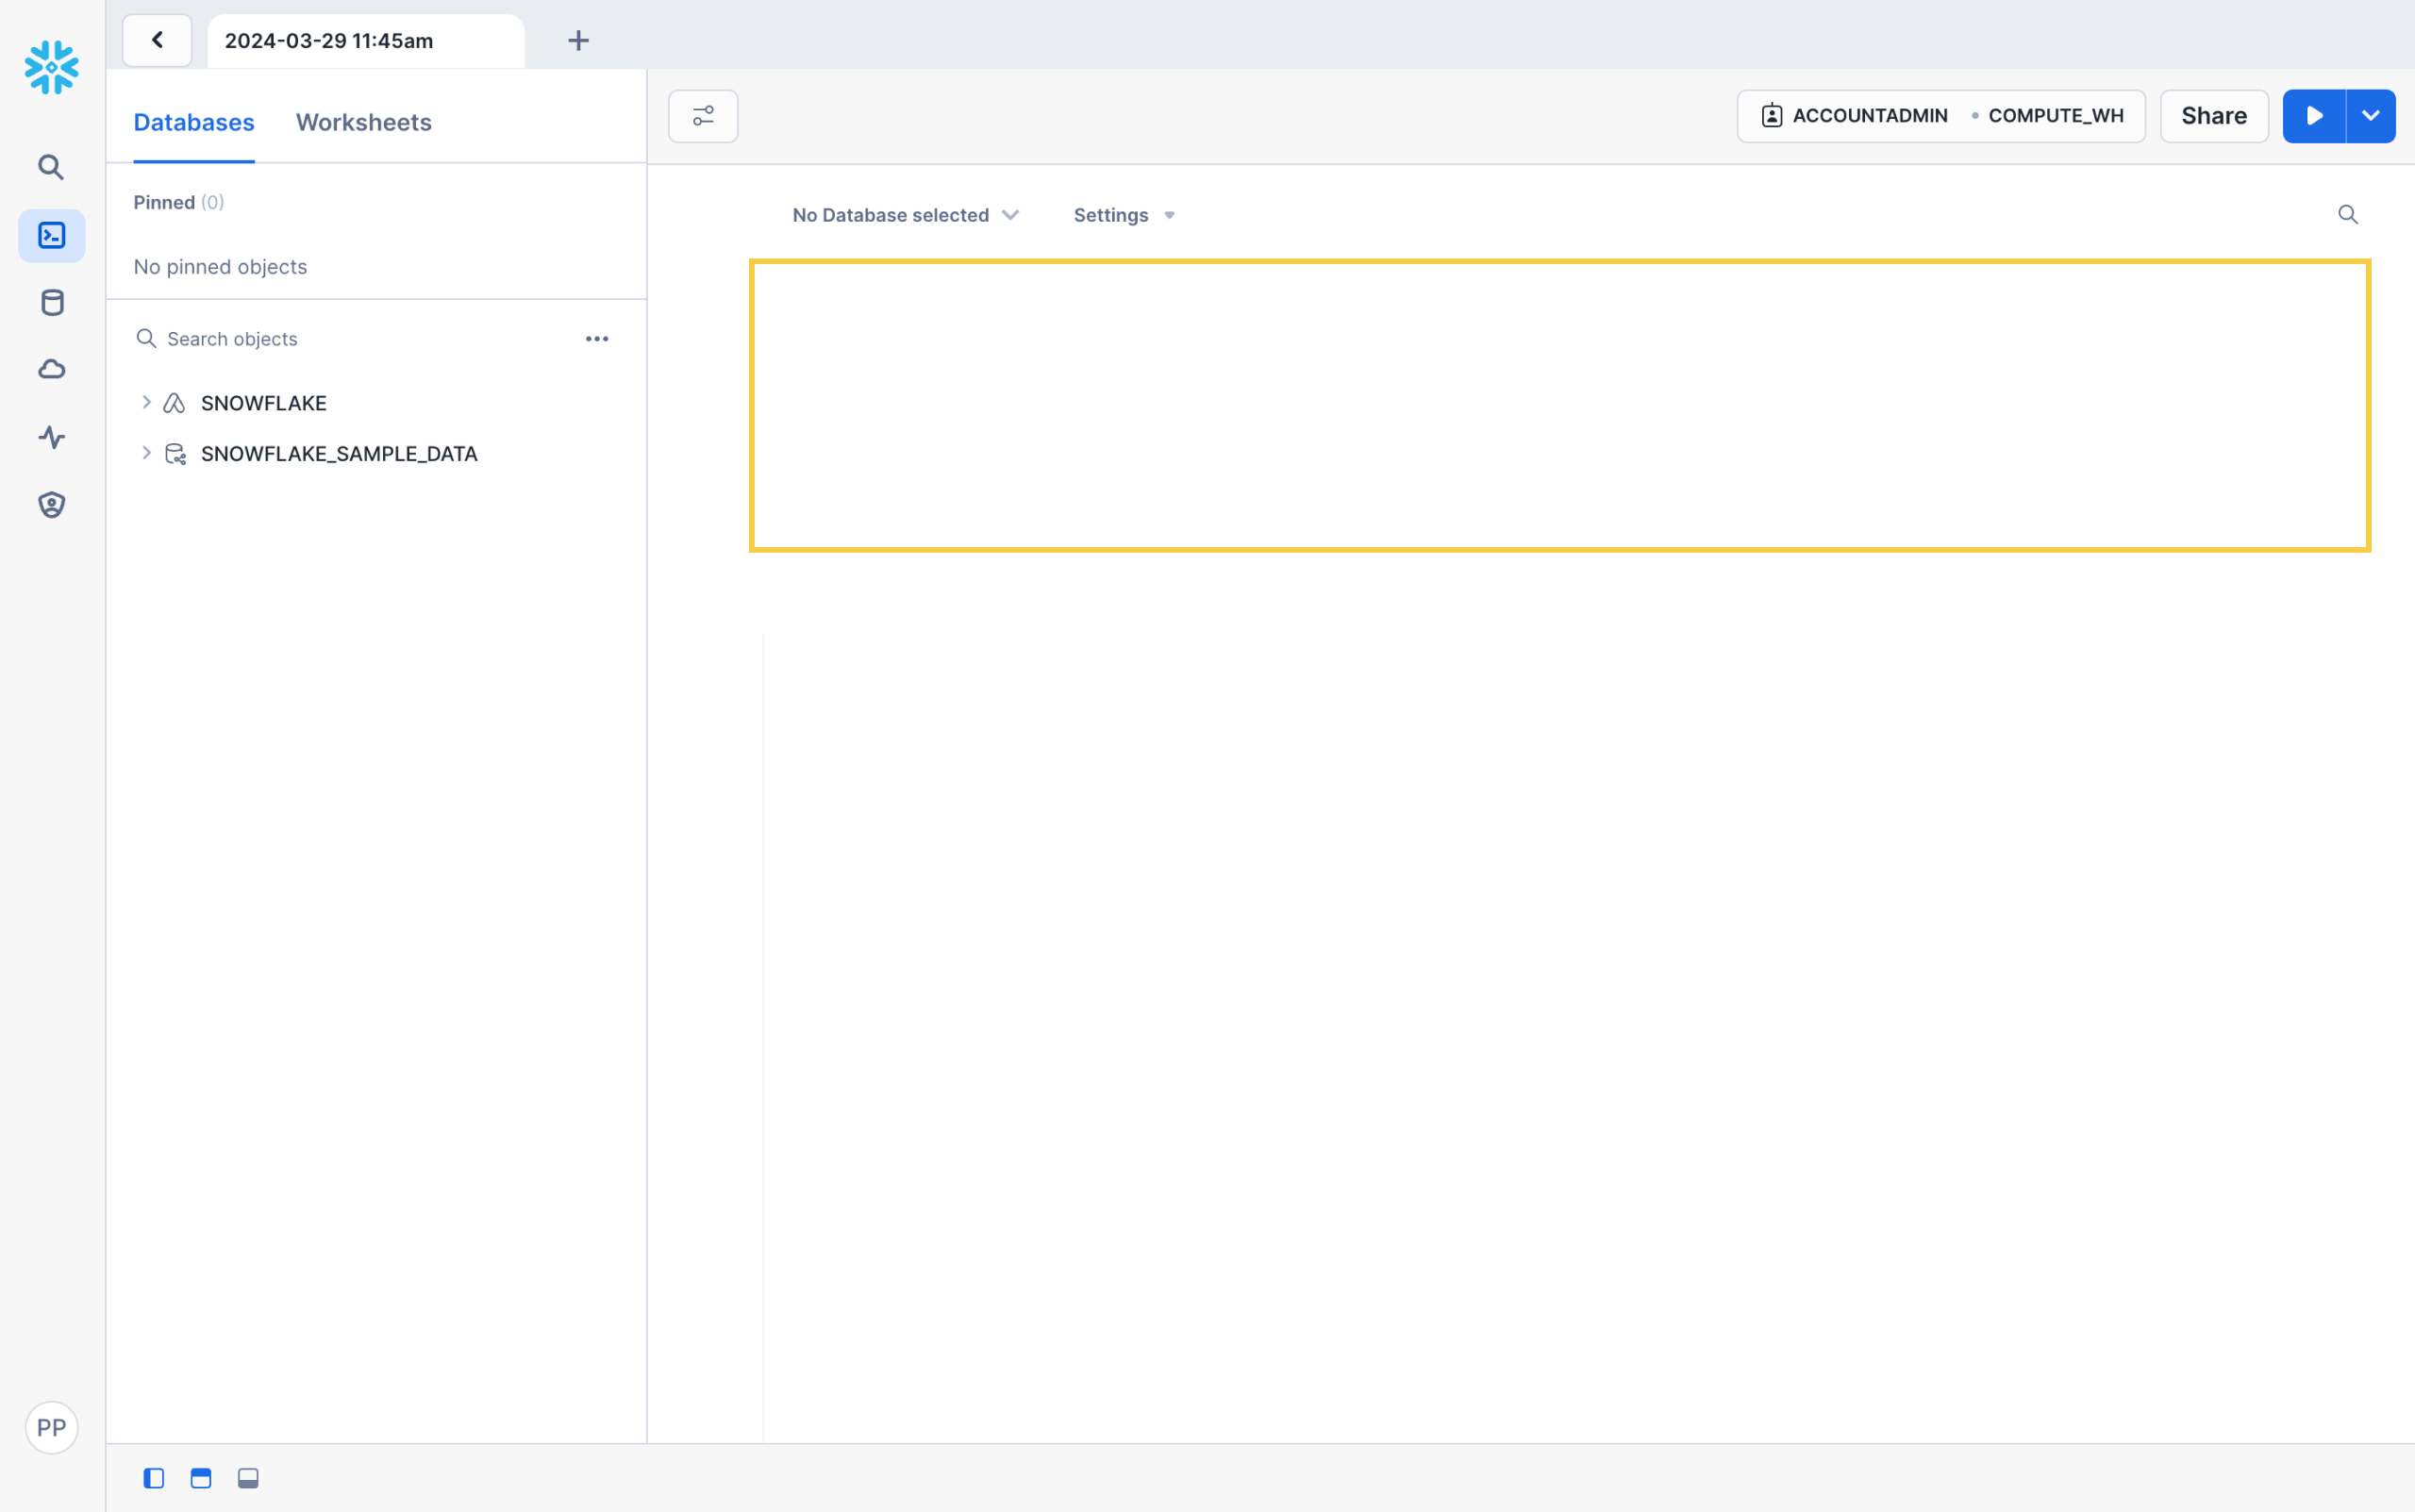
Sign in to your Snowflake account.
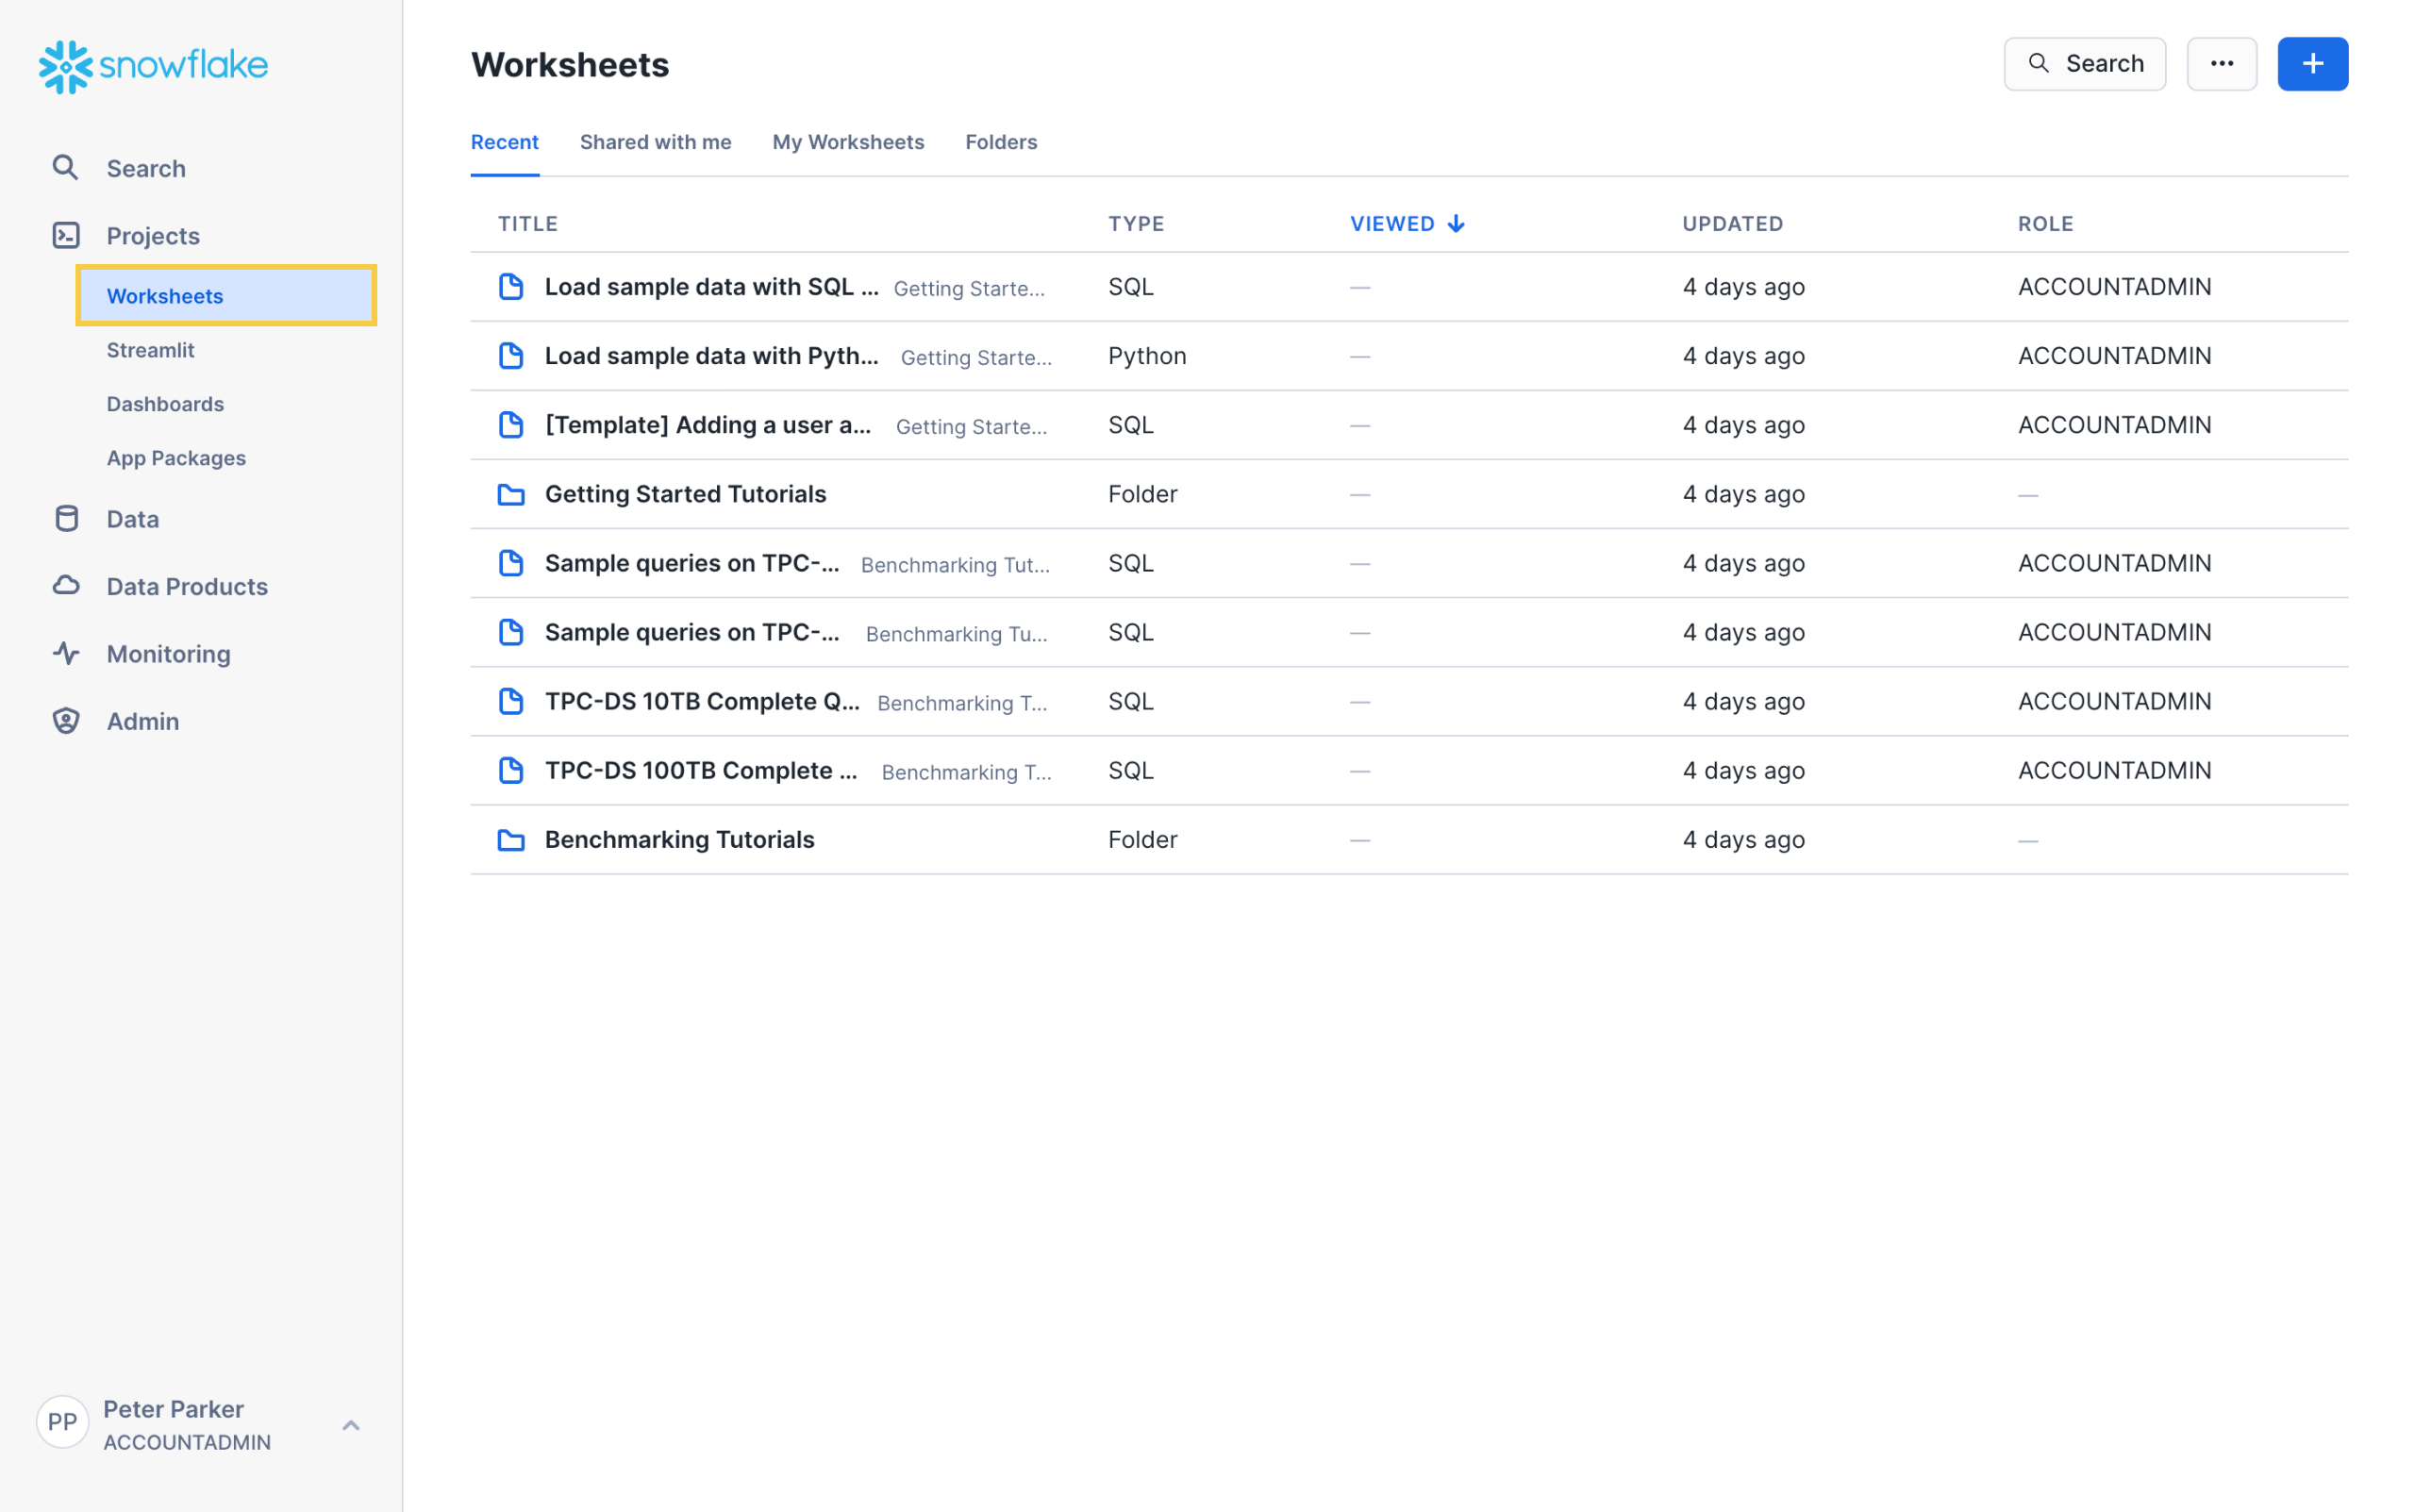
Select the Worksheets link from the vertical Projects menu.
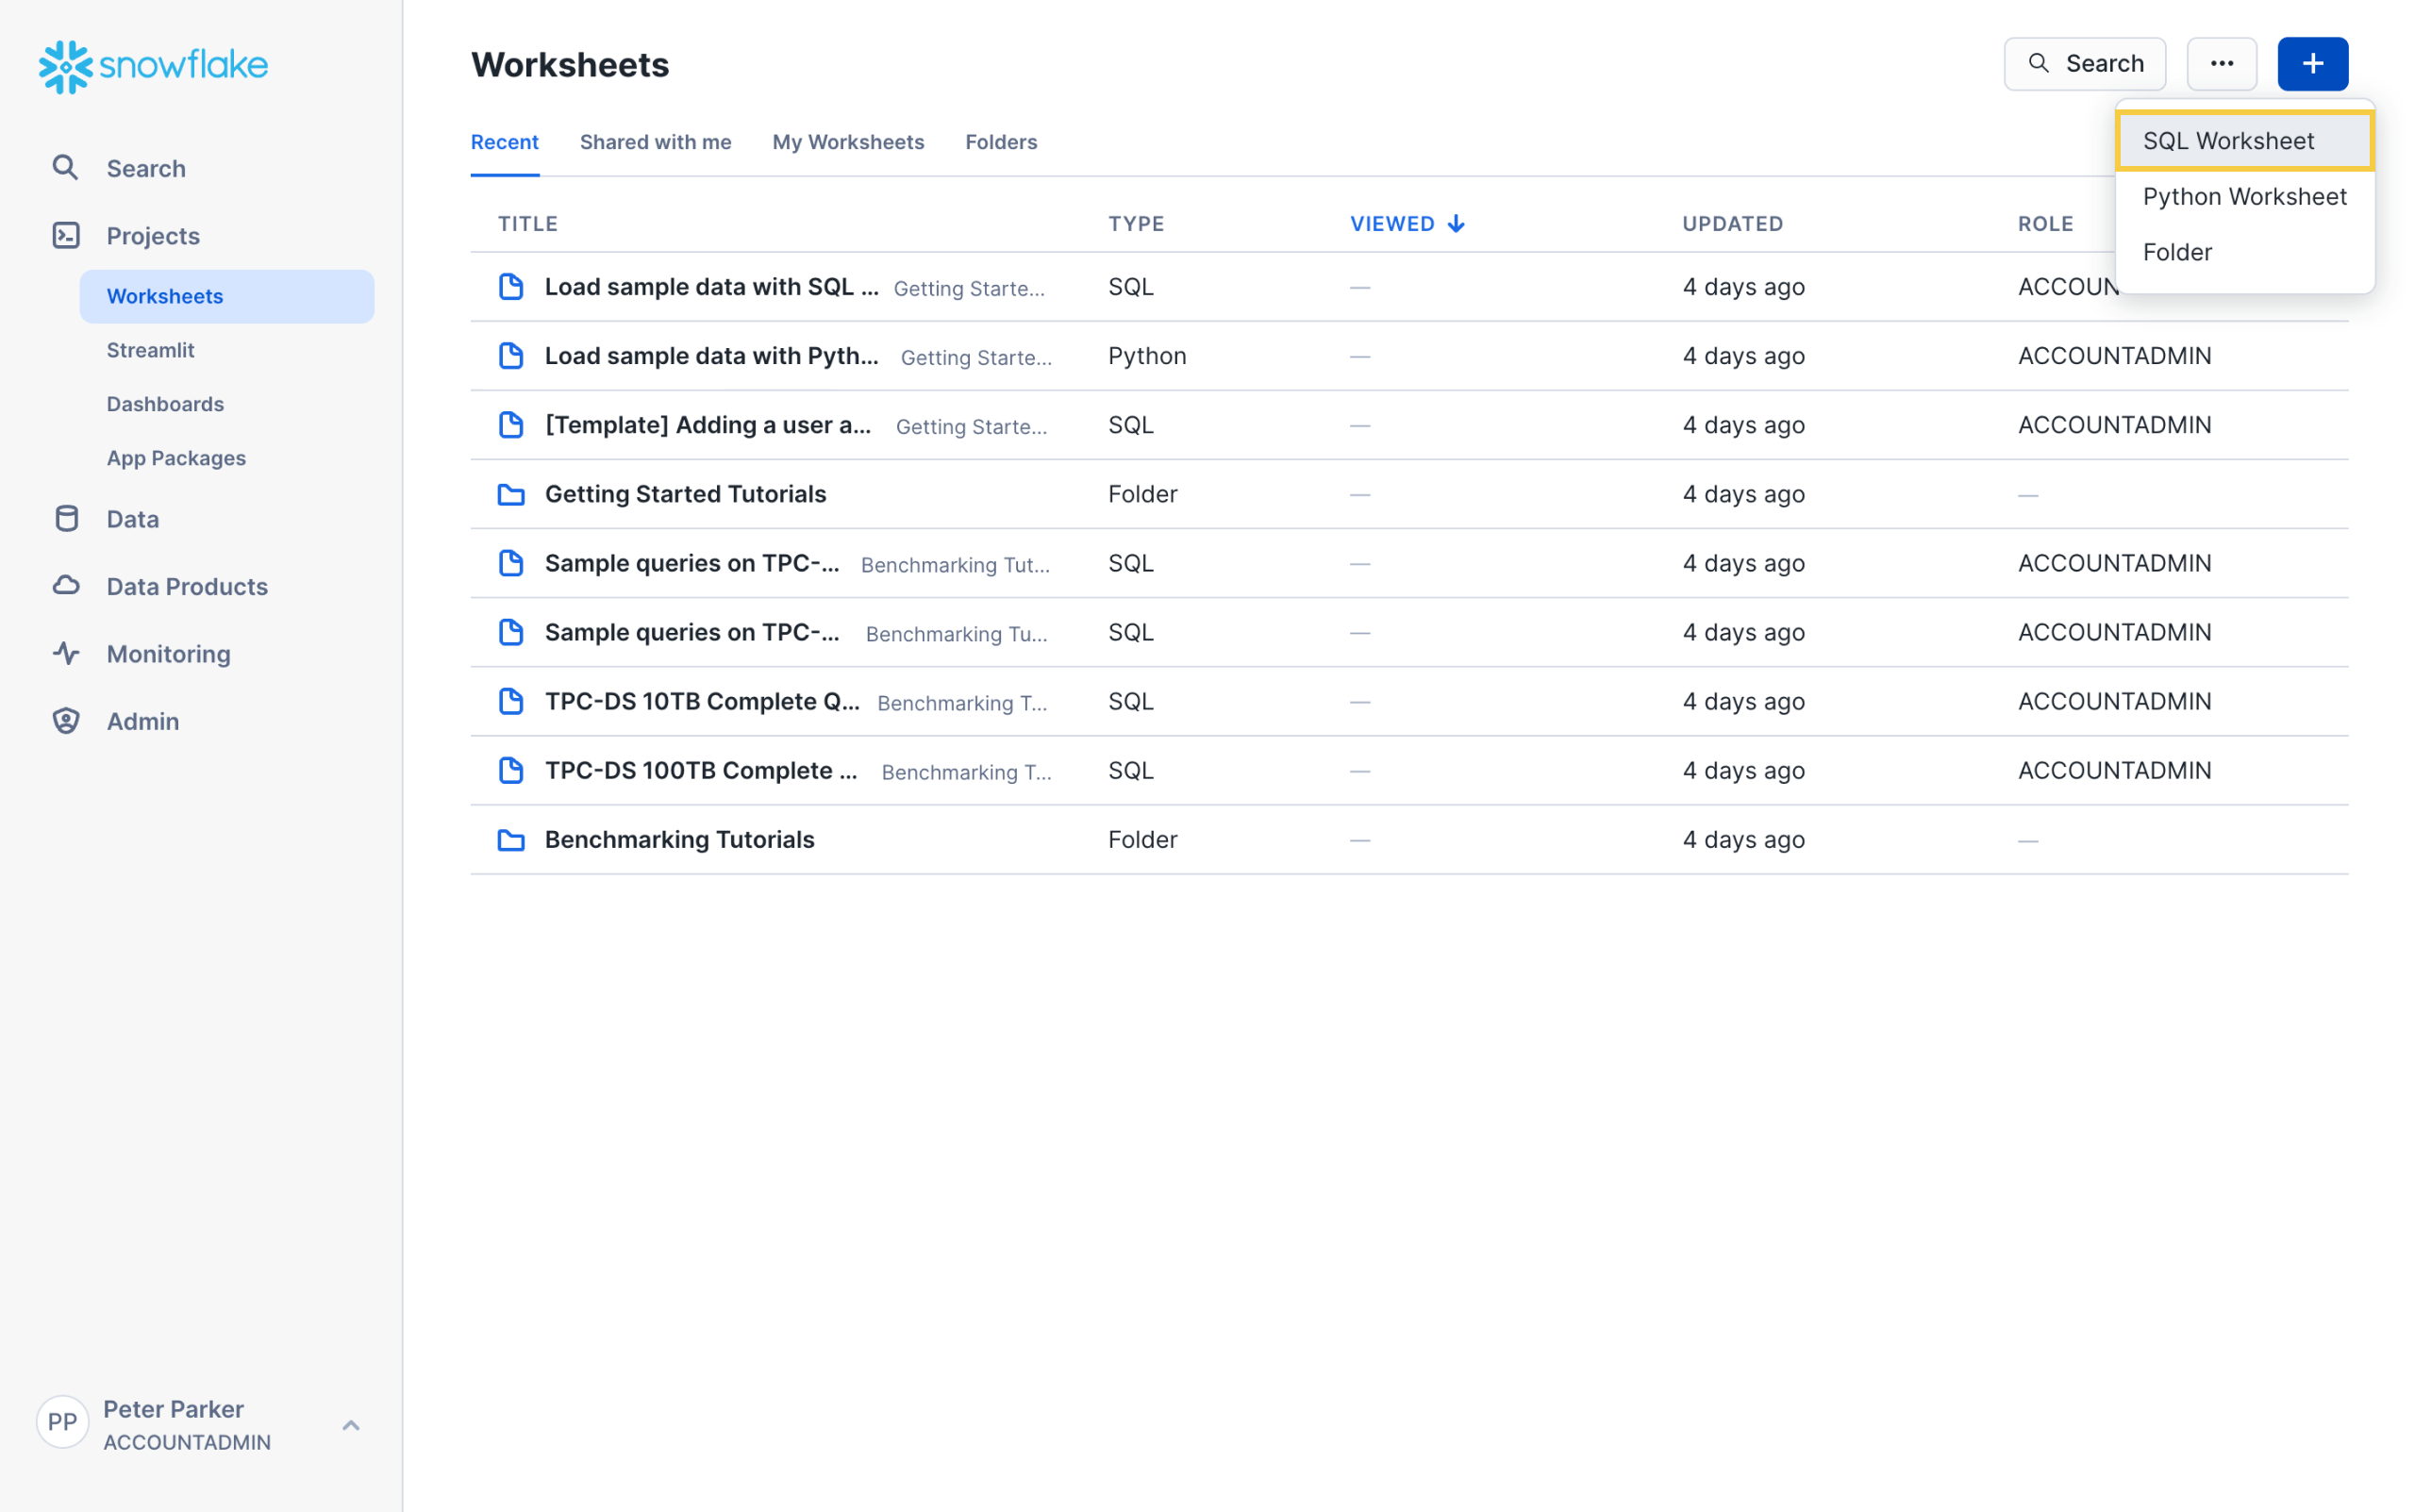
Select the Plus Sign icon located in the upper right corner. Then from the dropdown, select the SQL Worksheet link.
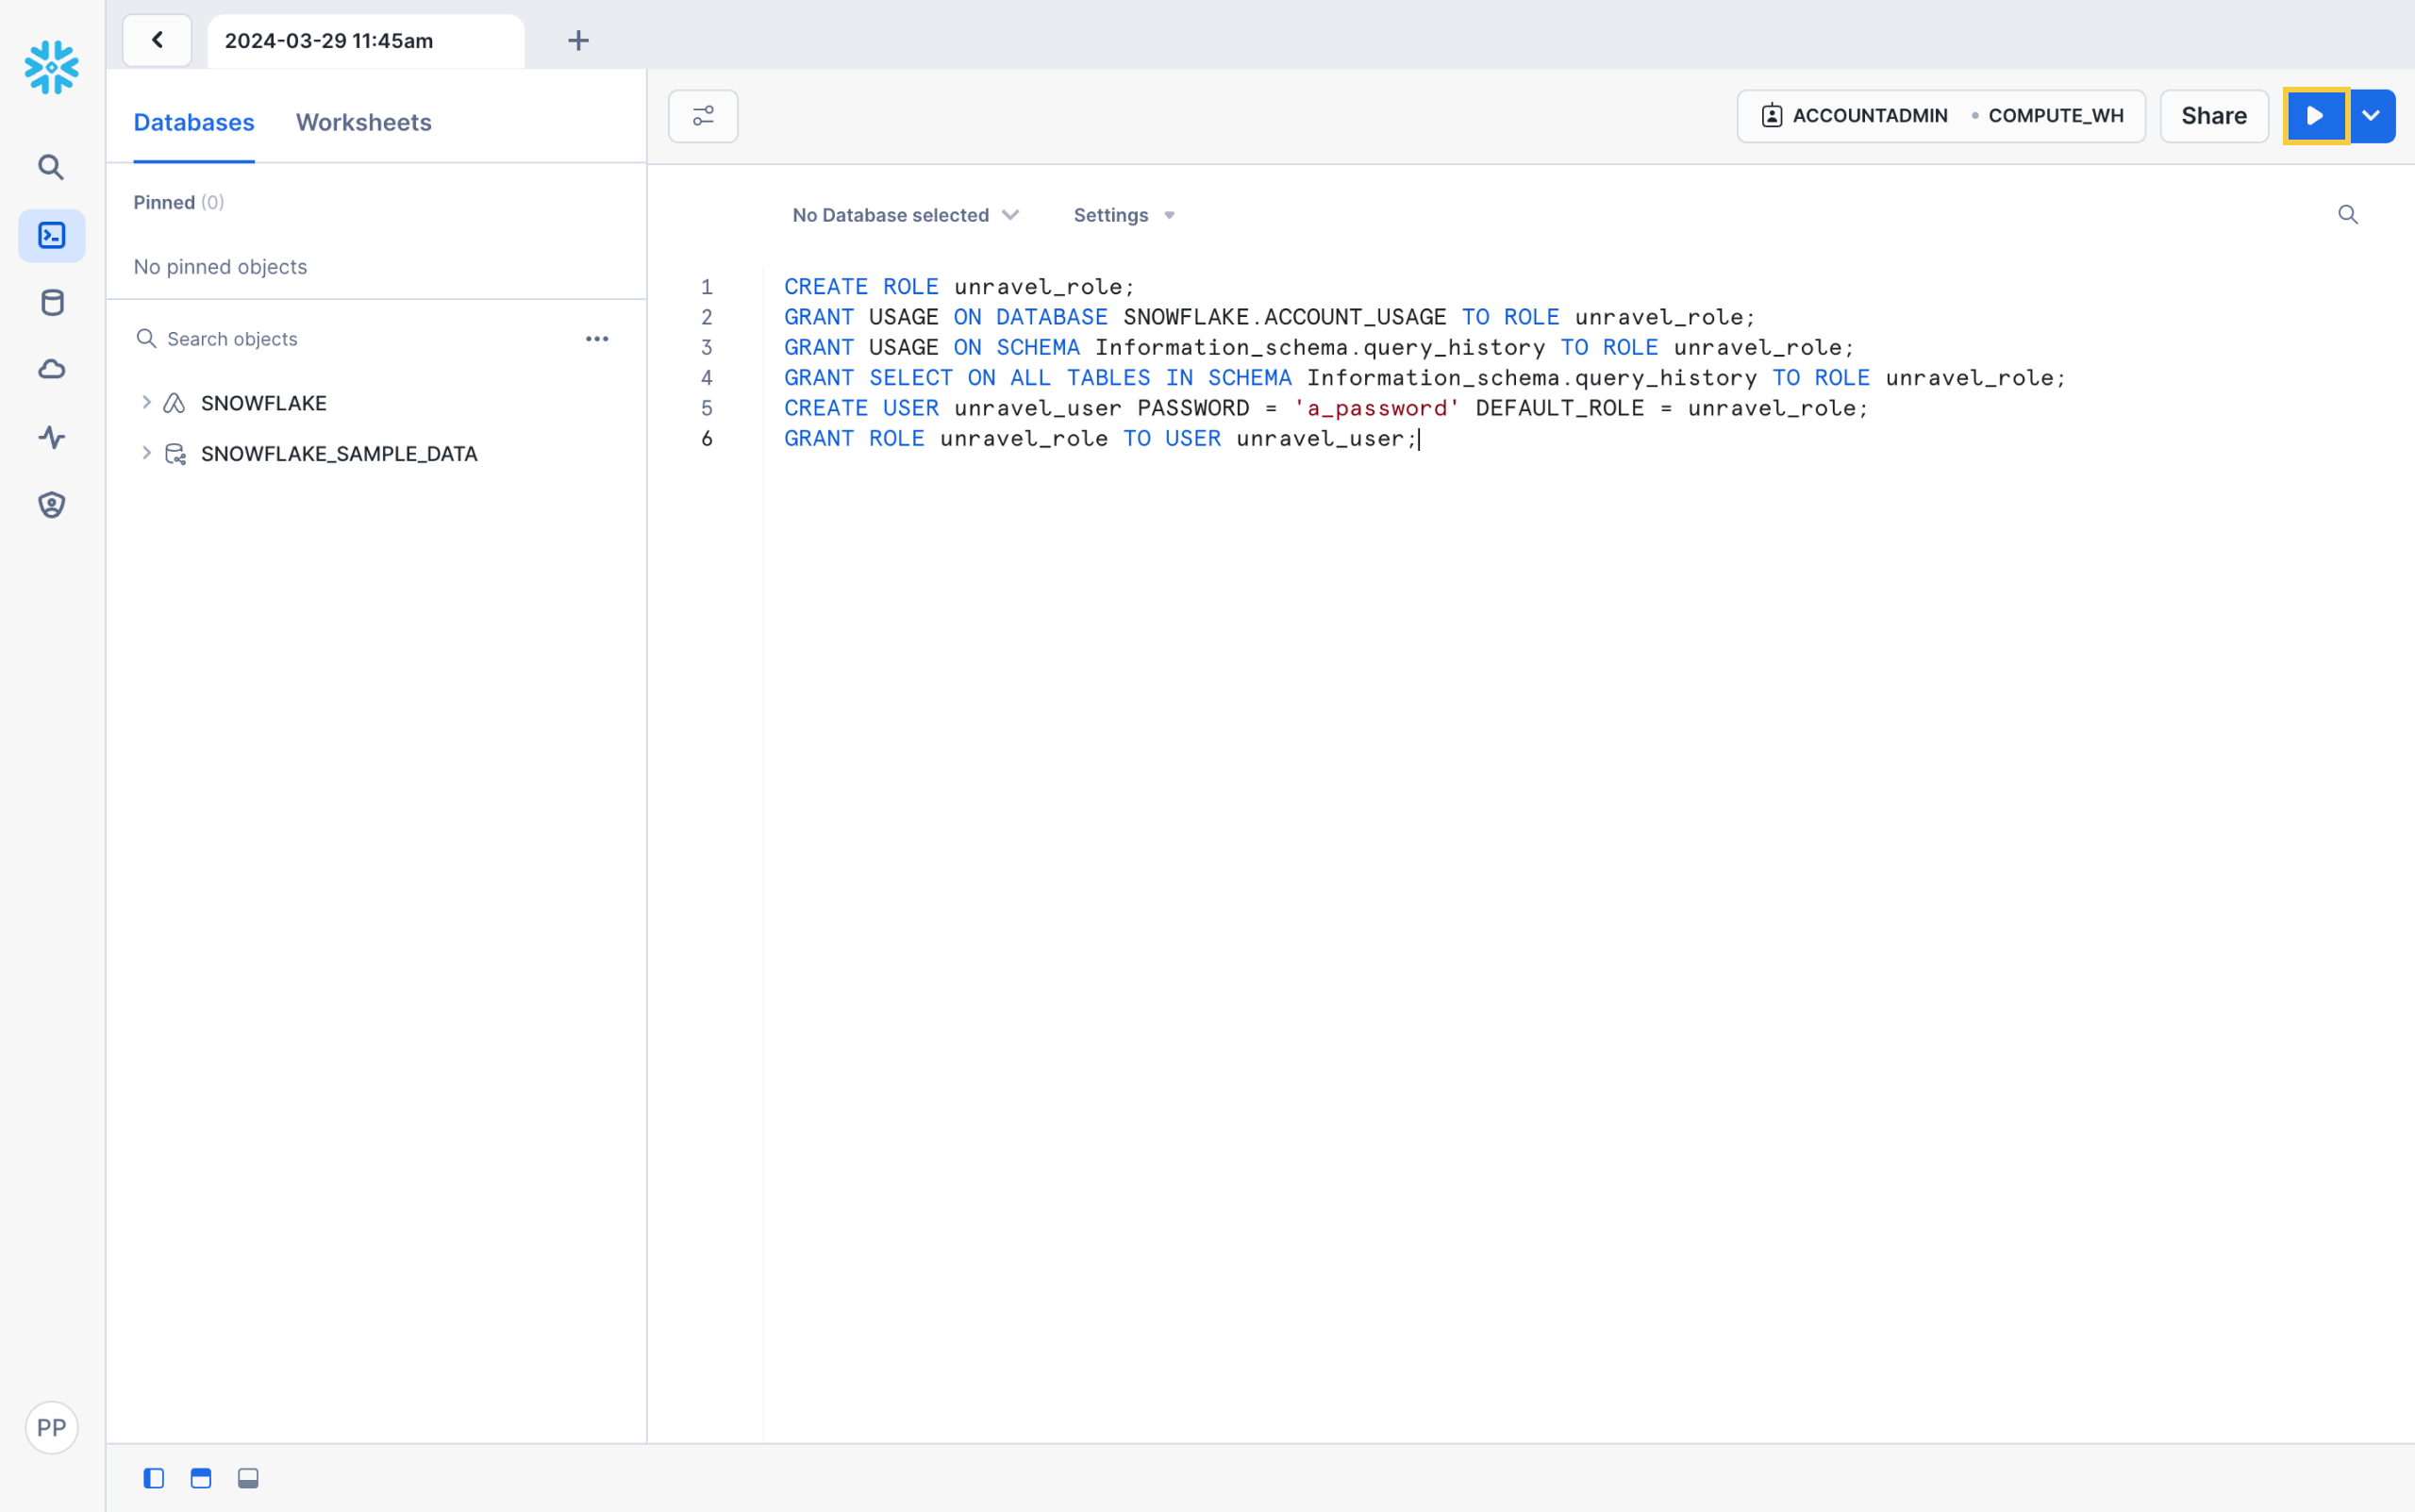
Copy/paste the provided script into the text box located on the right and update the provided snippet with your Snowflake database and schema information, then assign a password value for the Unravel user which will be created. You will need elevated privileges to run this script. See tip below for snippet code and instructions.
CODE SNIPPET AND INSTRUCTIONS
Below is the script to be executed followed by an example, parameters to be set are displayed in bold. The example enters database and schema information for the default settings in Snowflake. If your Snowflake database has been customized, use the database and schema in your Snowflake account.
CREATE ROLE unravel_role;
GRANT USAGE ON DATABASE your_database TO ROLE unravel_role;
GRANT USAGE ON SCHEMA your_database.your_schema TO ROLE unravel_role;
GRANT SELECT ON ALL TABLES IN SCHEMA your_database.your_schema TO ROLE unravel_role;
CREATE USER unravel_user PASSWORD = ‘a_password‘ DEFAULT_ROLE = unravel_role;
GRANT ROLE unravel_role TO USER unravel_user;
CREATE ROLE unravel_role;
GRANT USAGE ON DATABASE SNOWFLAKE.ACCOUNT_USAGE TO ROLE unravel_role;
GRANT USAGE ON SCHEMA Information_schema.query_history TO ROLE unravel_role;
GRANT SELECT ON ALL TABLES IN SCHEMA Information_schema.query_history TO ROLE unravel_role;
CREATE USER unravel_user PASSWORD = ‘a_password‘ DEFAULT_ROLE = unravel_role;
GRANT ROLE unravel_role TO USER unravel_user;
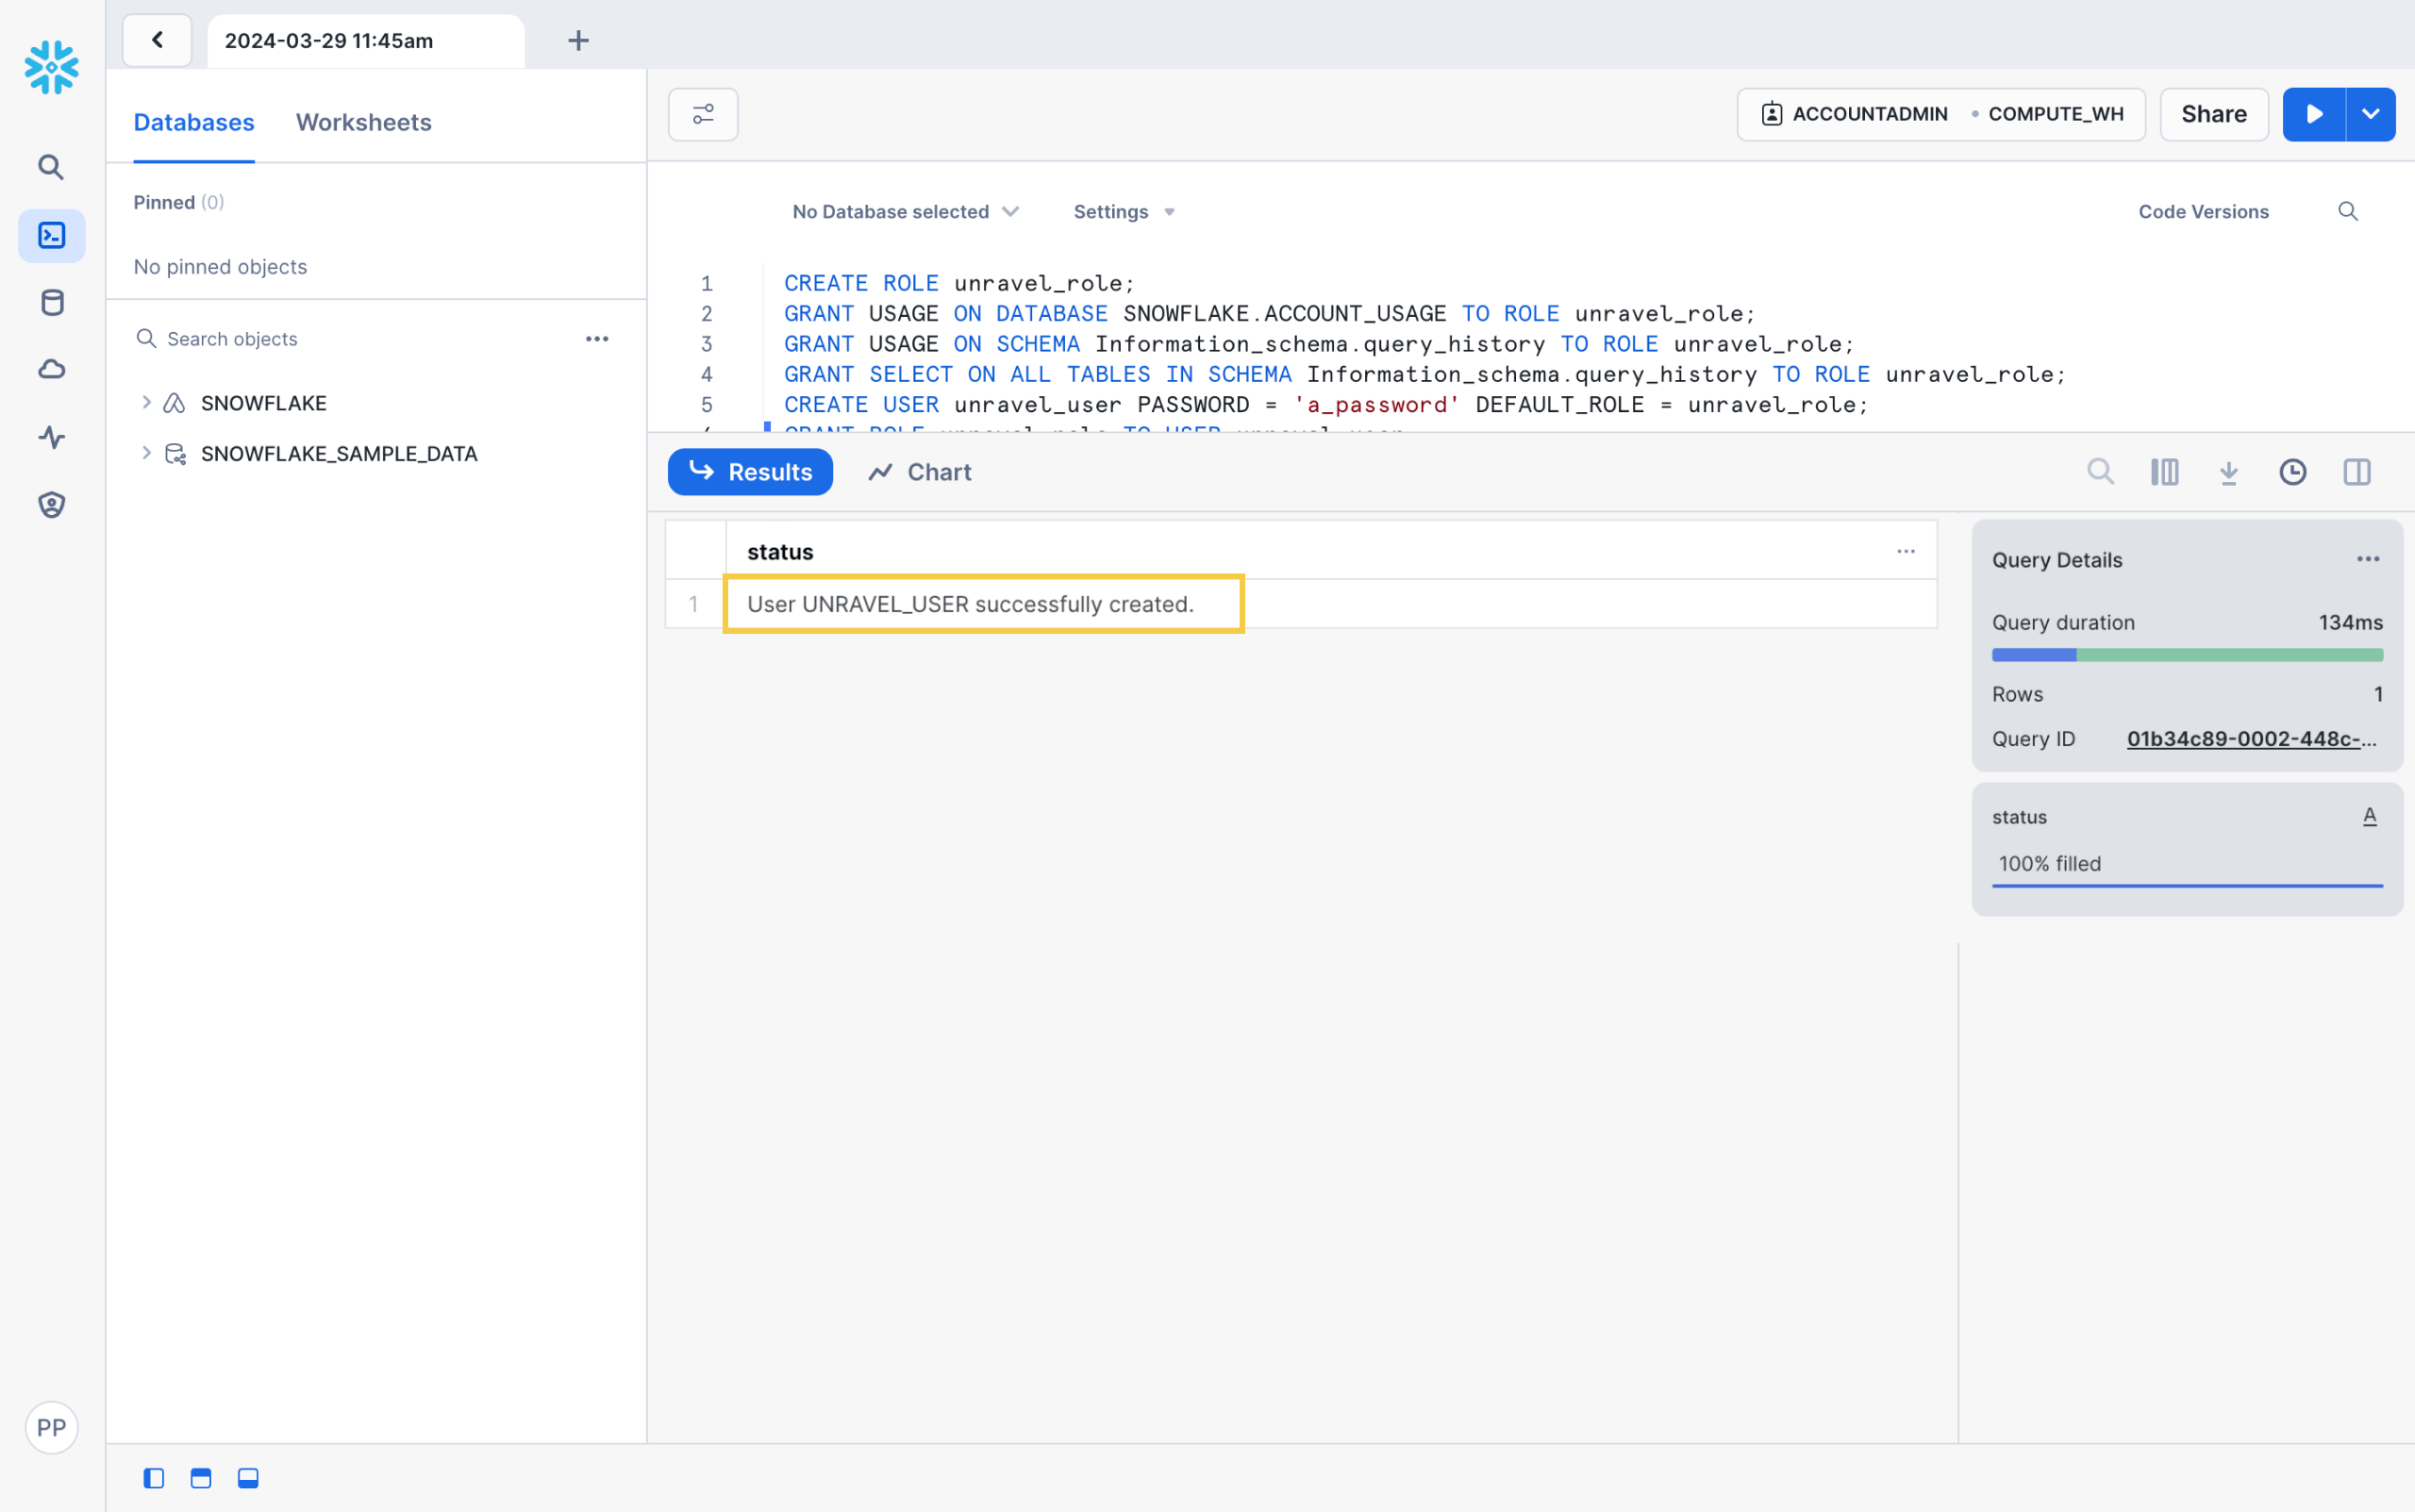
Execute a script by selecting the Play icon located in the upper right corner.
Congrats, your new Unravel user is now created!
** DO NOT REMOVE Hidden Margin Required **
** DO NOT REMOVE Hidden Margin Required **
** DO NOT REMOVE Hidden Margin Required **
** DO NOT REMOVE Hidden Margin Required **
CONFIGURE UNRAVEL
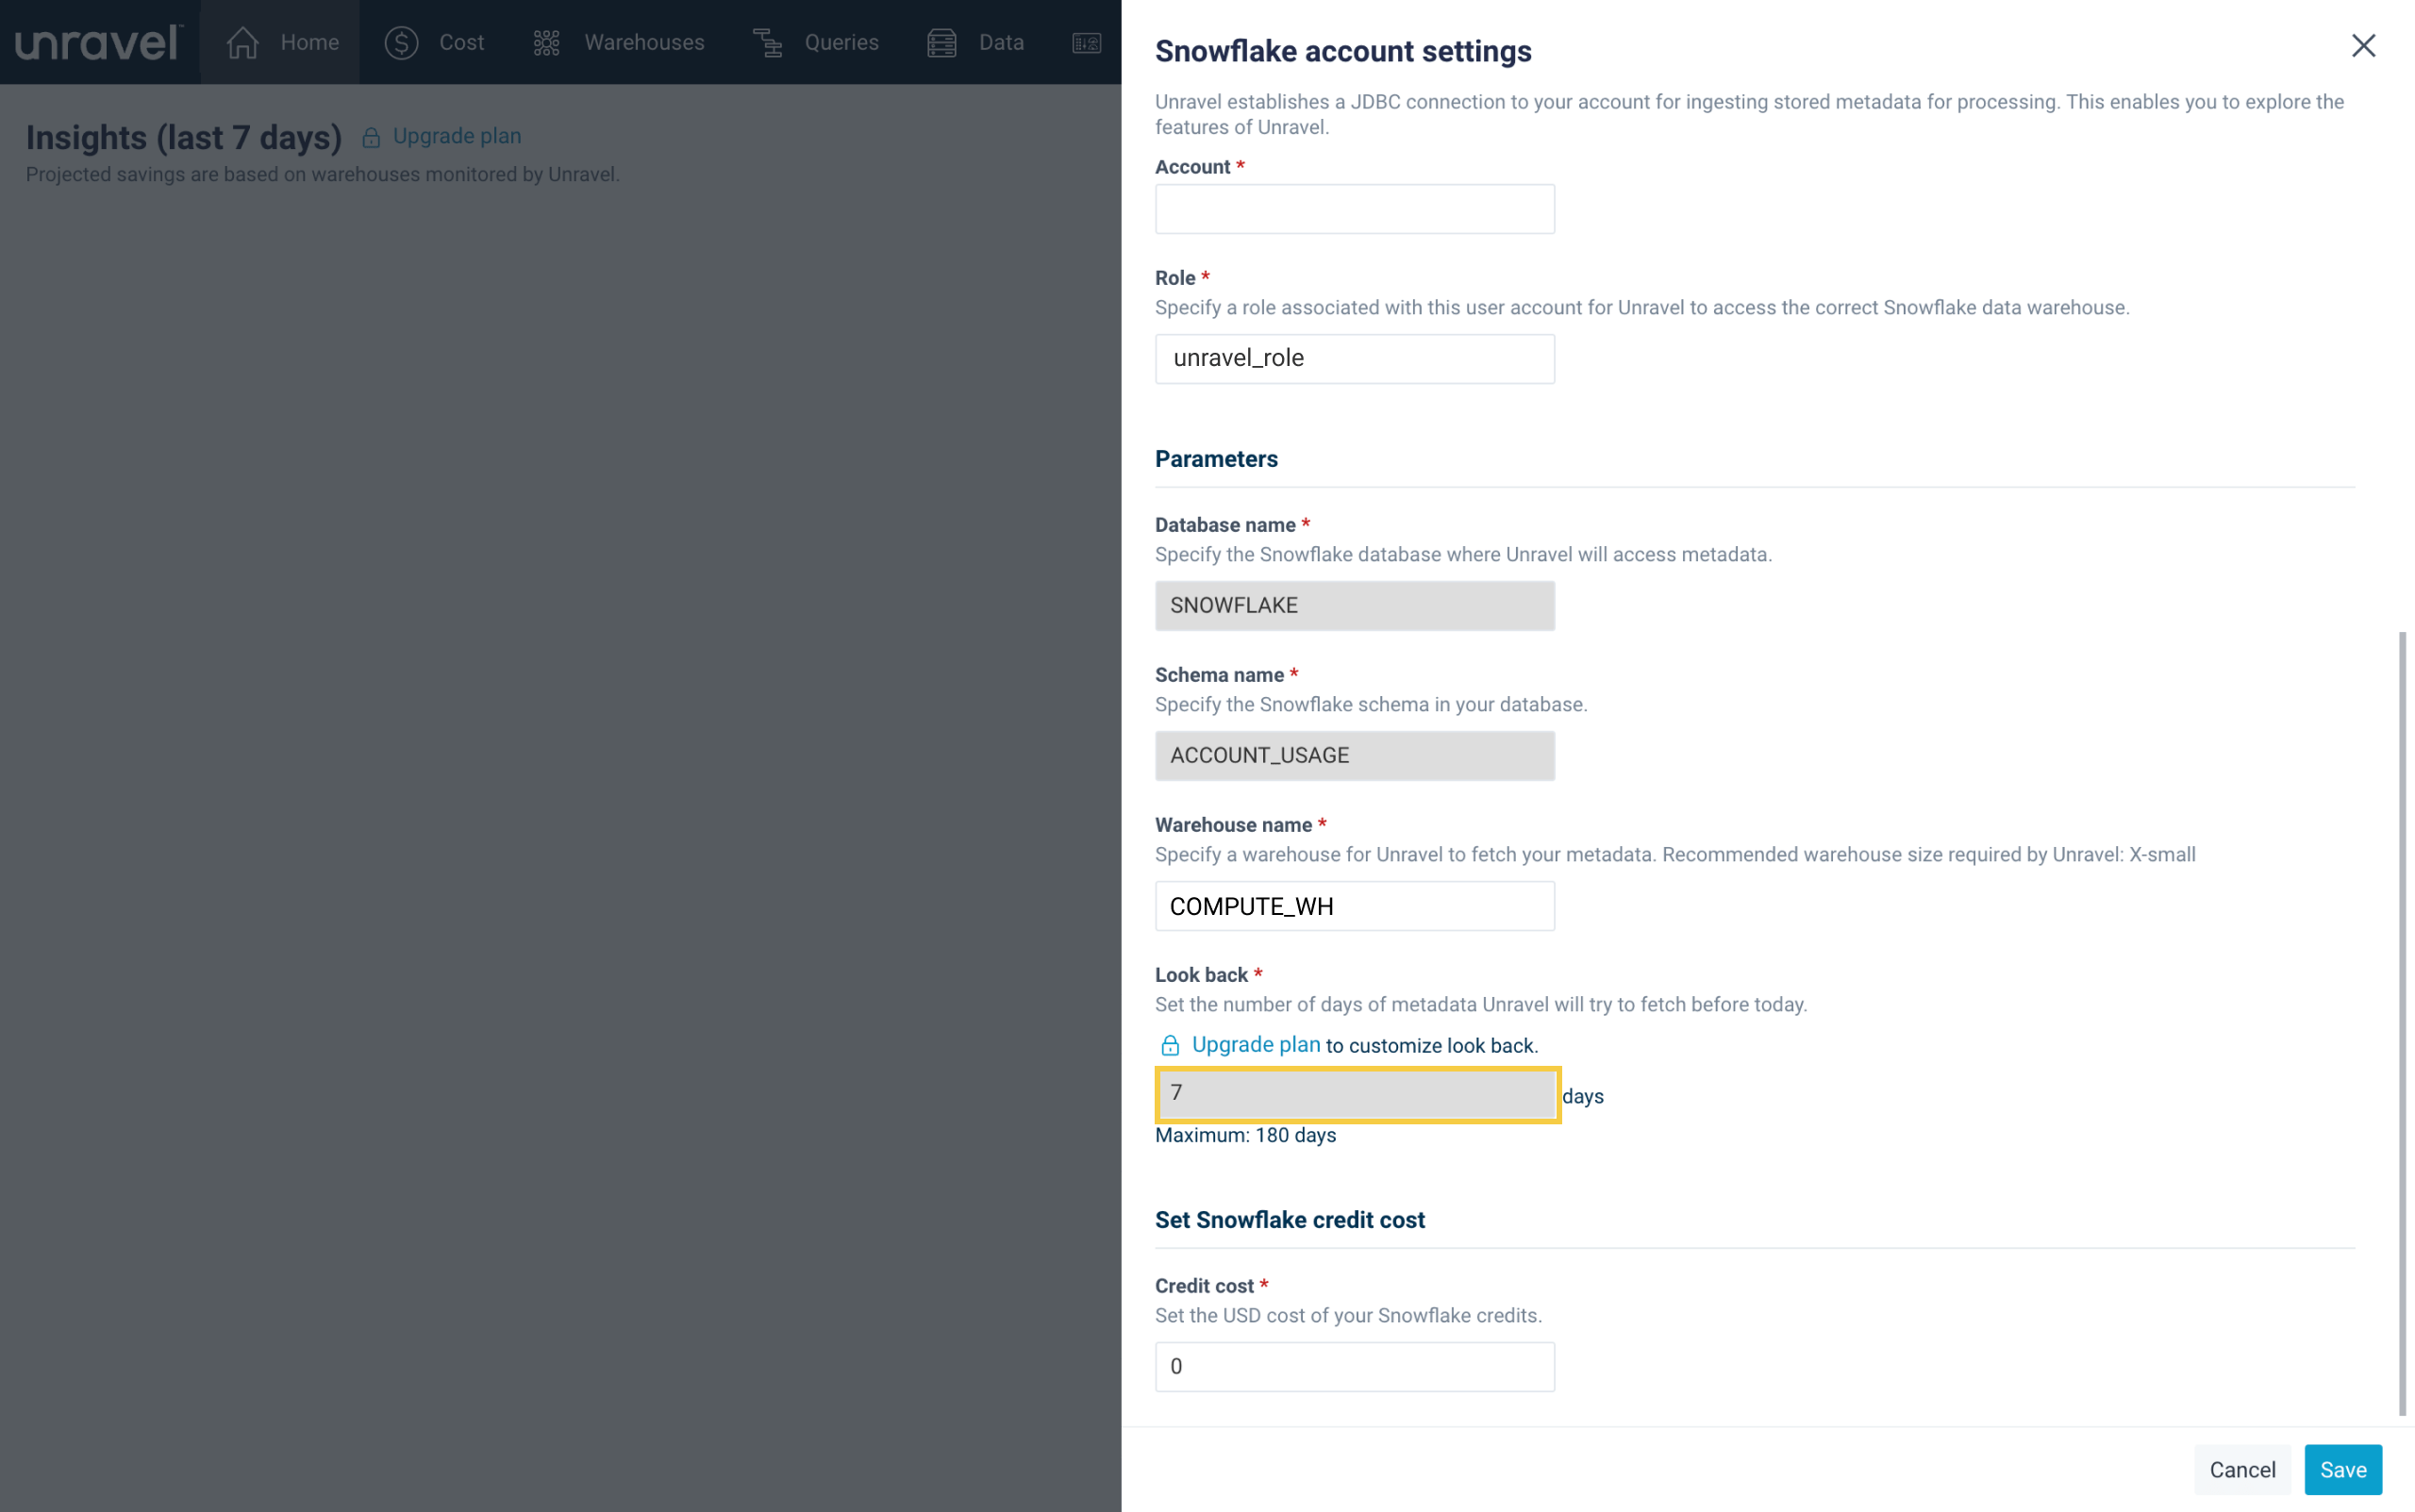
Step 2: Add your Snowflake account within Unravel
In this step we will add your Snowflake account to Unravel by filling out a short form with information regarding your account and the newly created Unravel user.
WHAT YOU NEED
Administrator-level access to your Snowflake account and the password that was assigned to your new Unravel user created in Snowflake as part of the previous step.
** DO NOT REMOVE Hidden Margin Required **
** DO NOT REMOVE Hidden Margin Required **
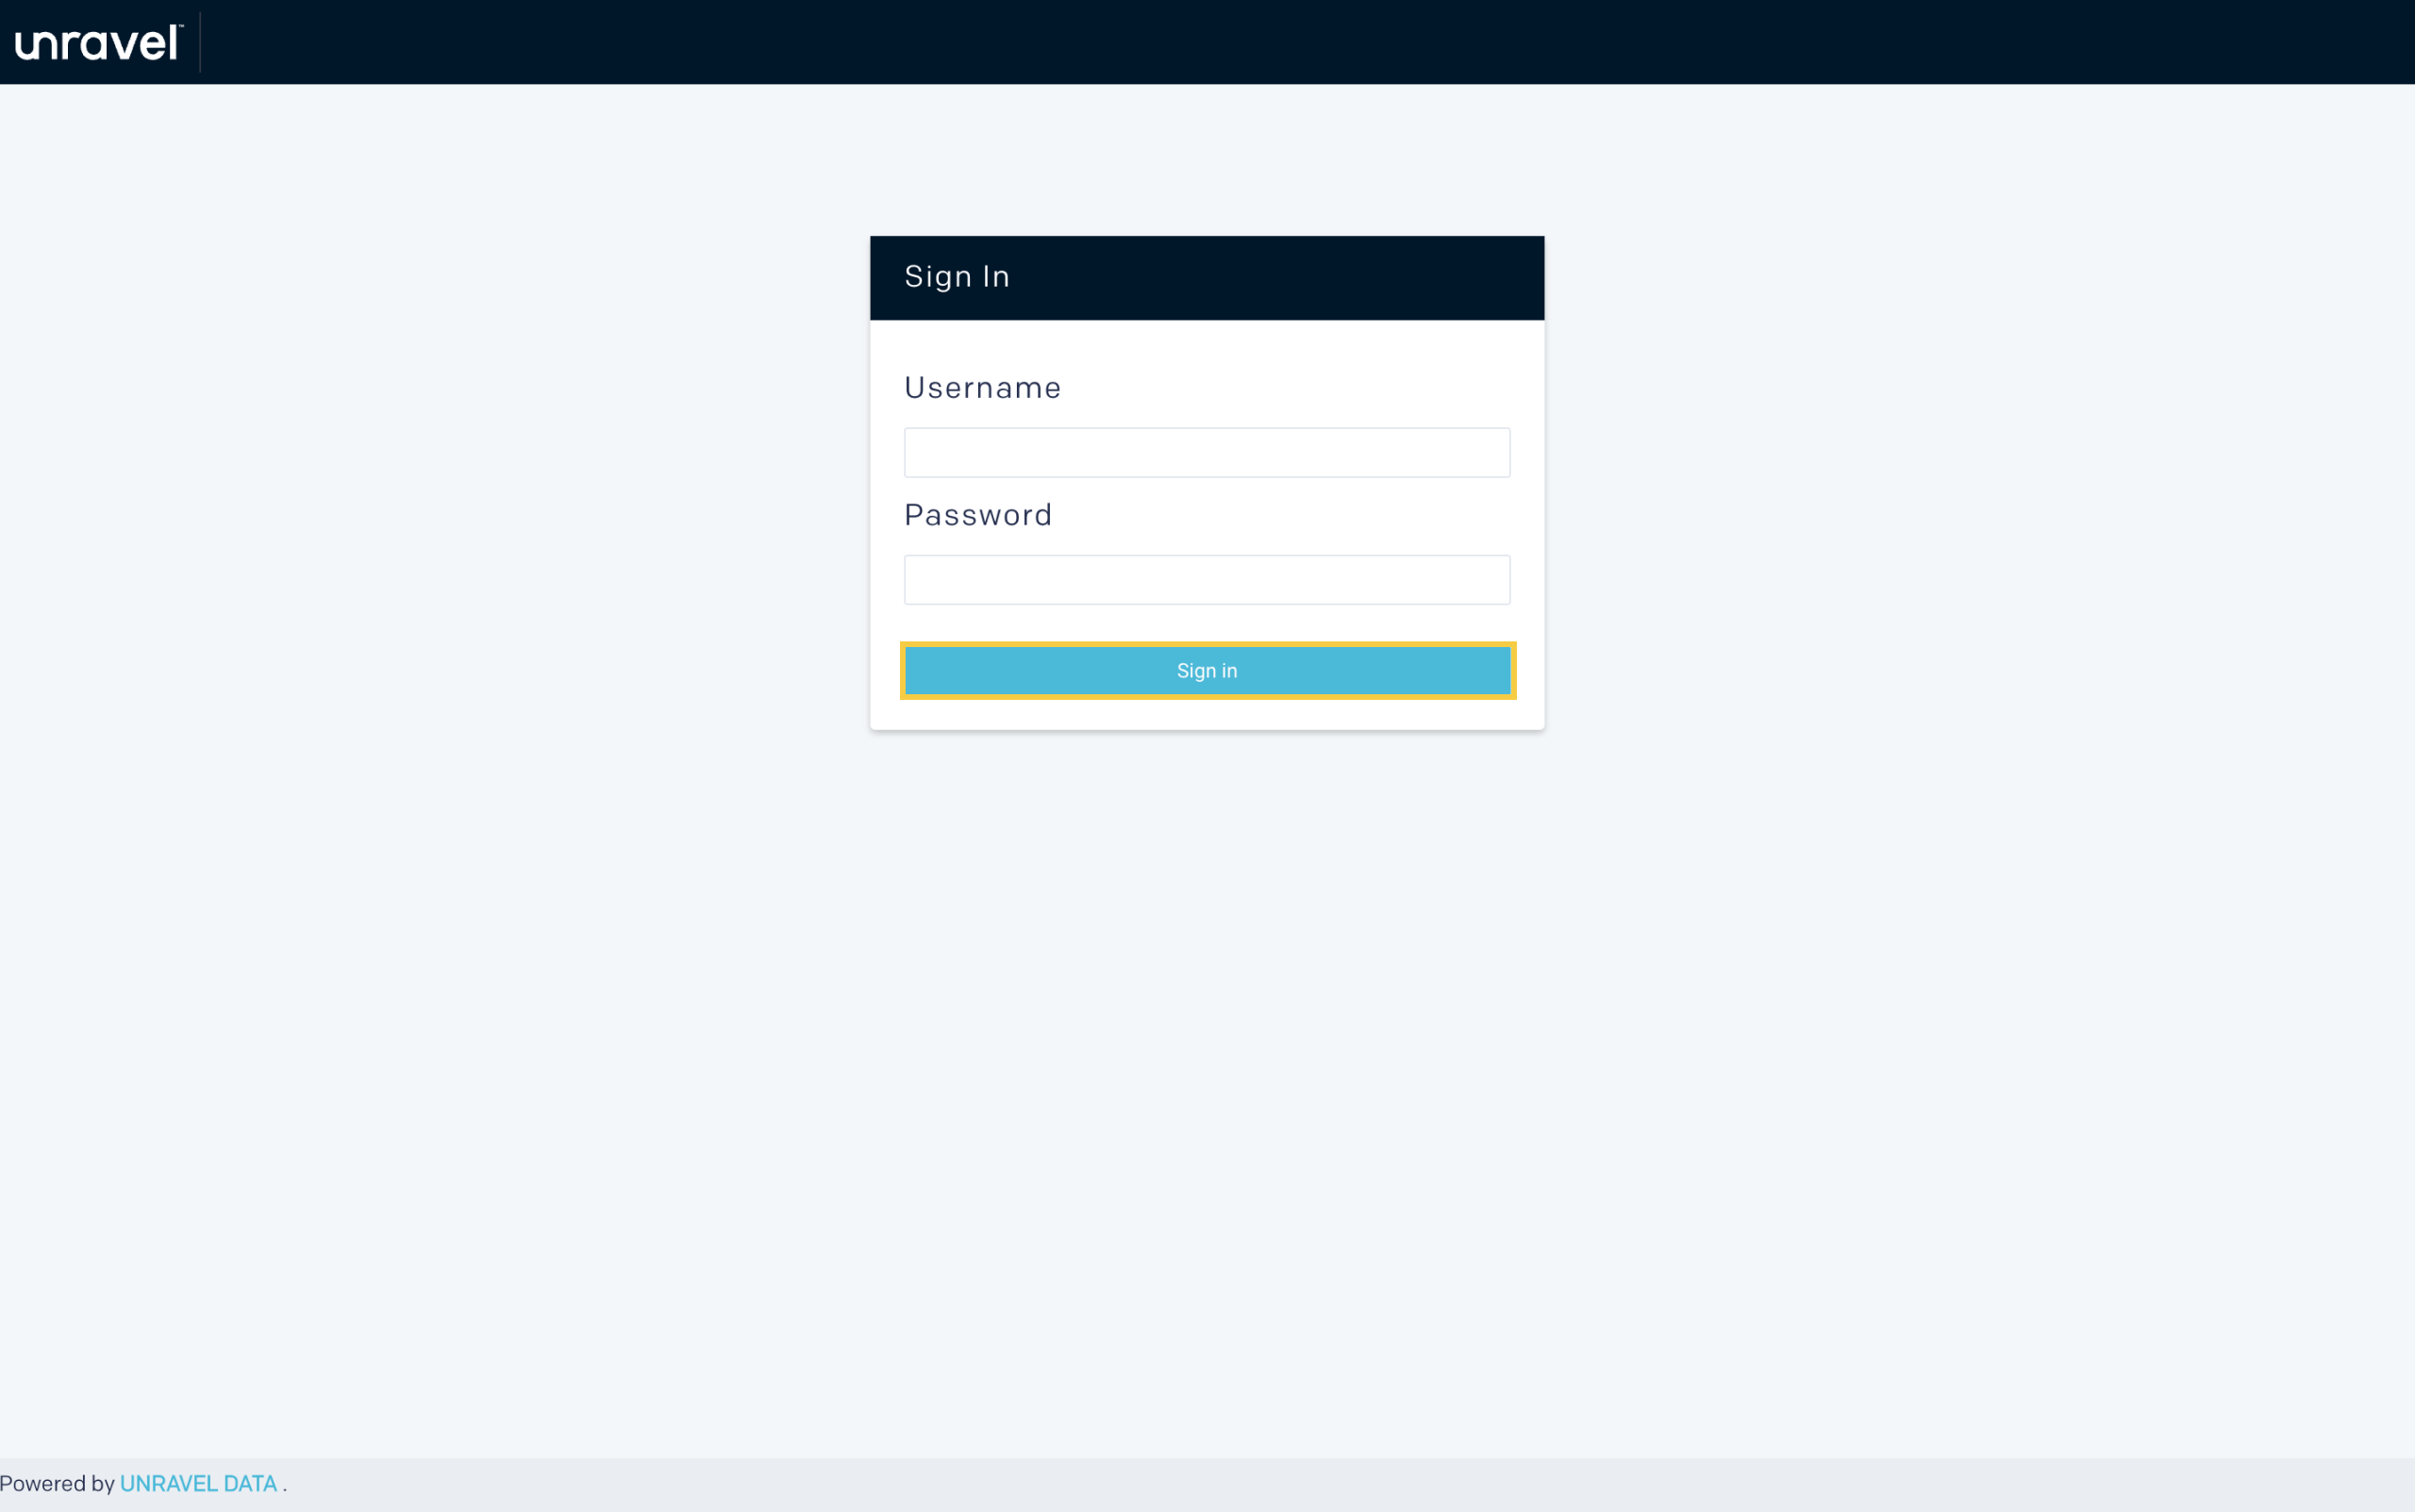
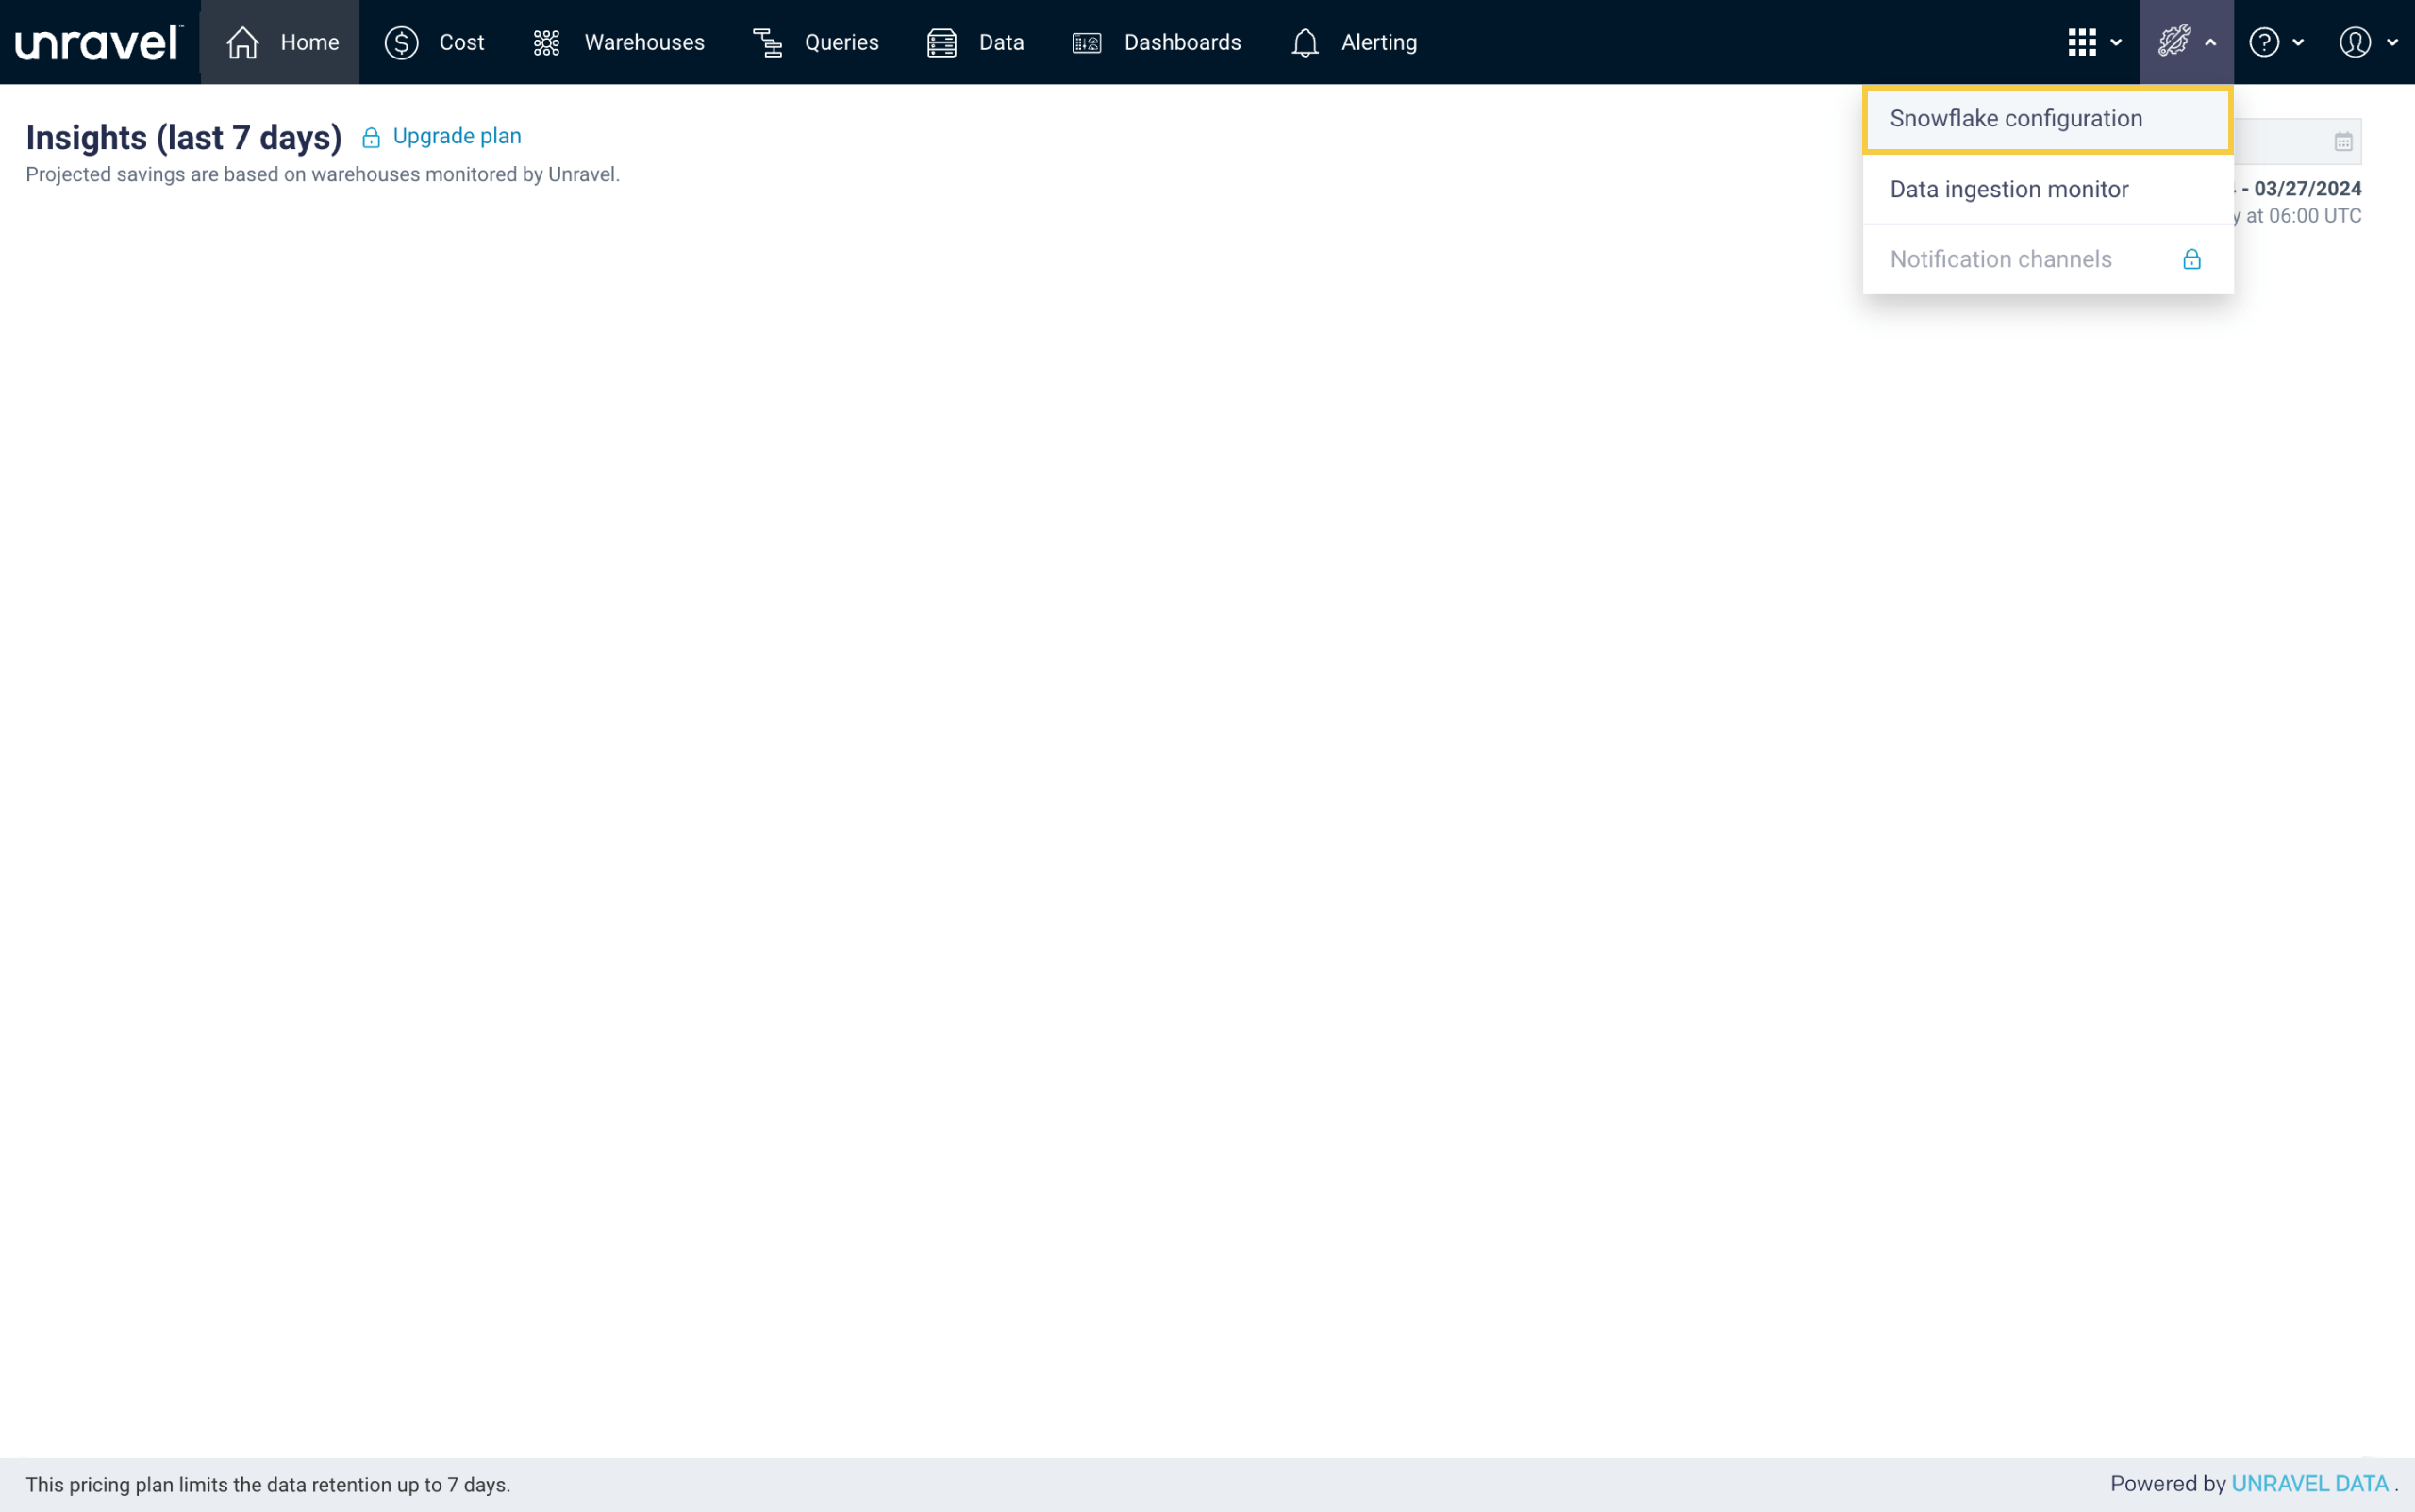
Sign in to your Unravel account.
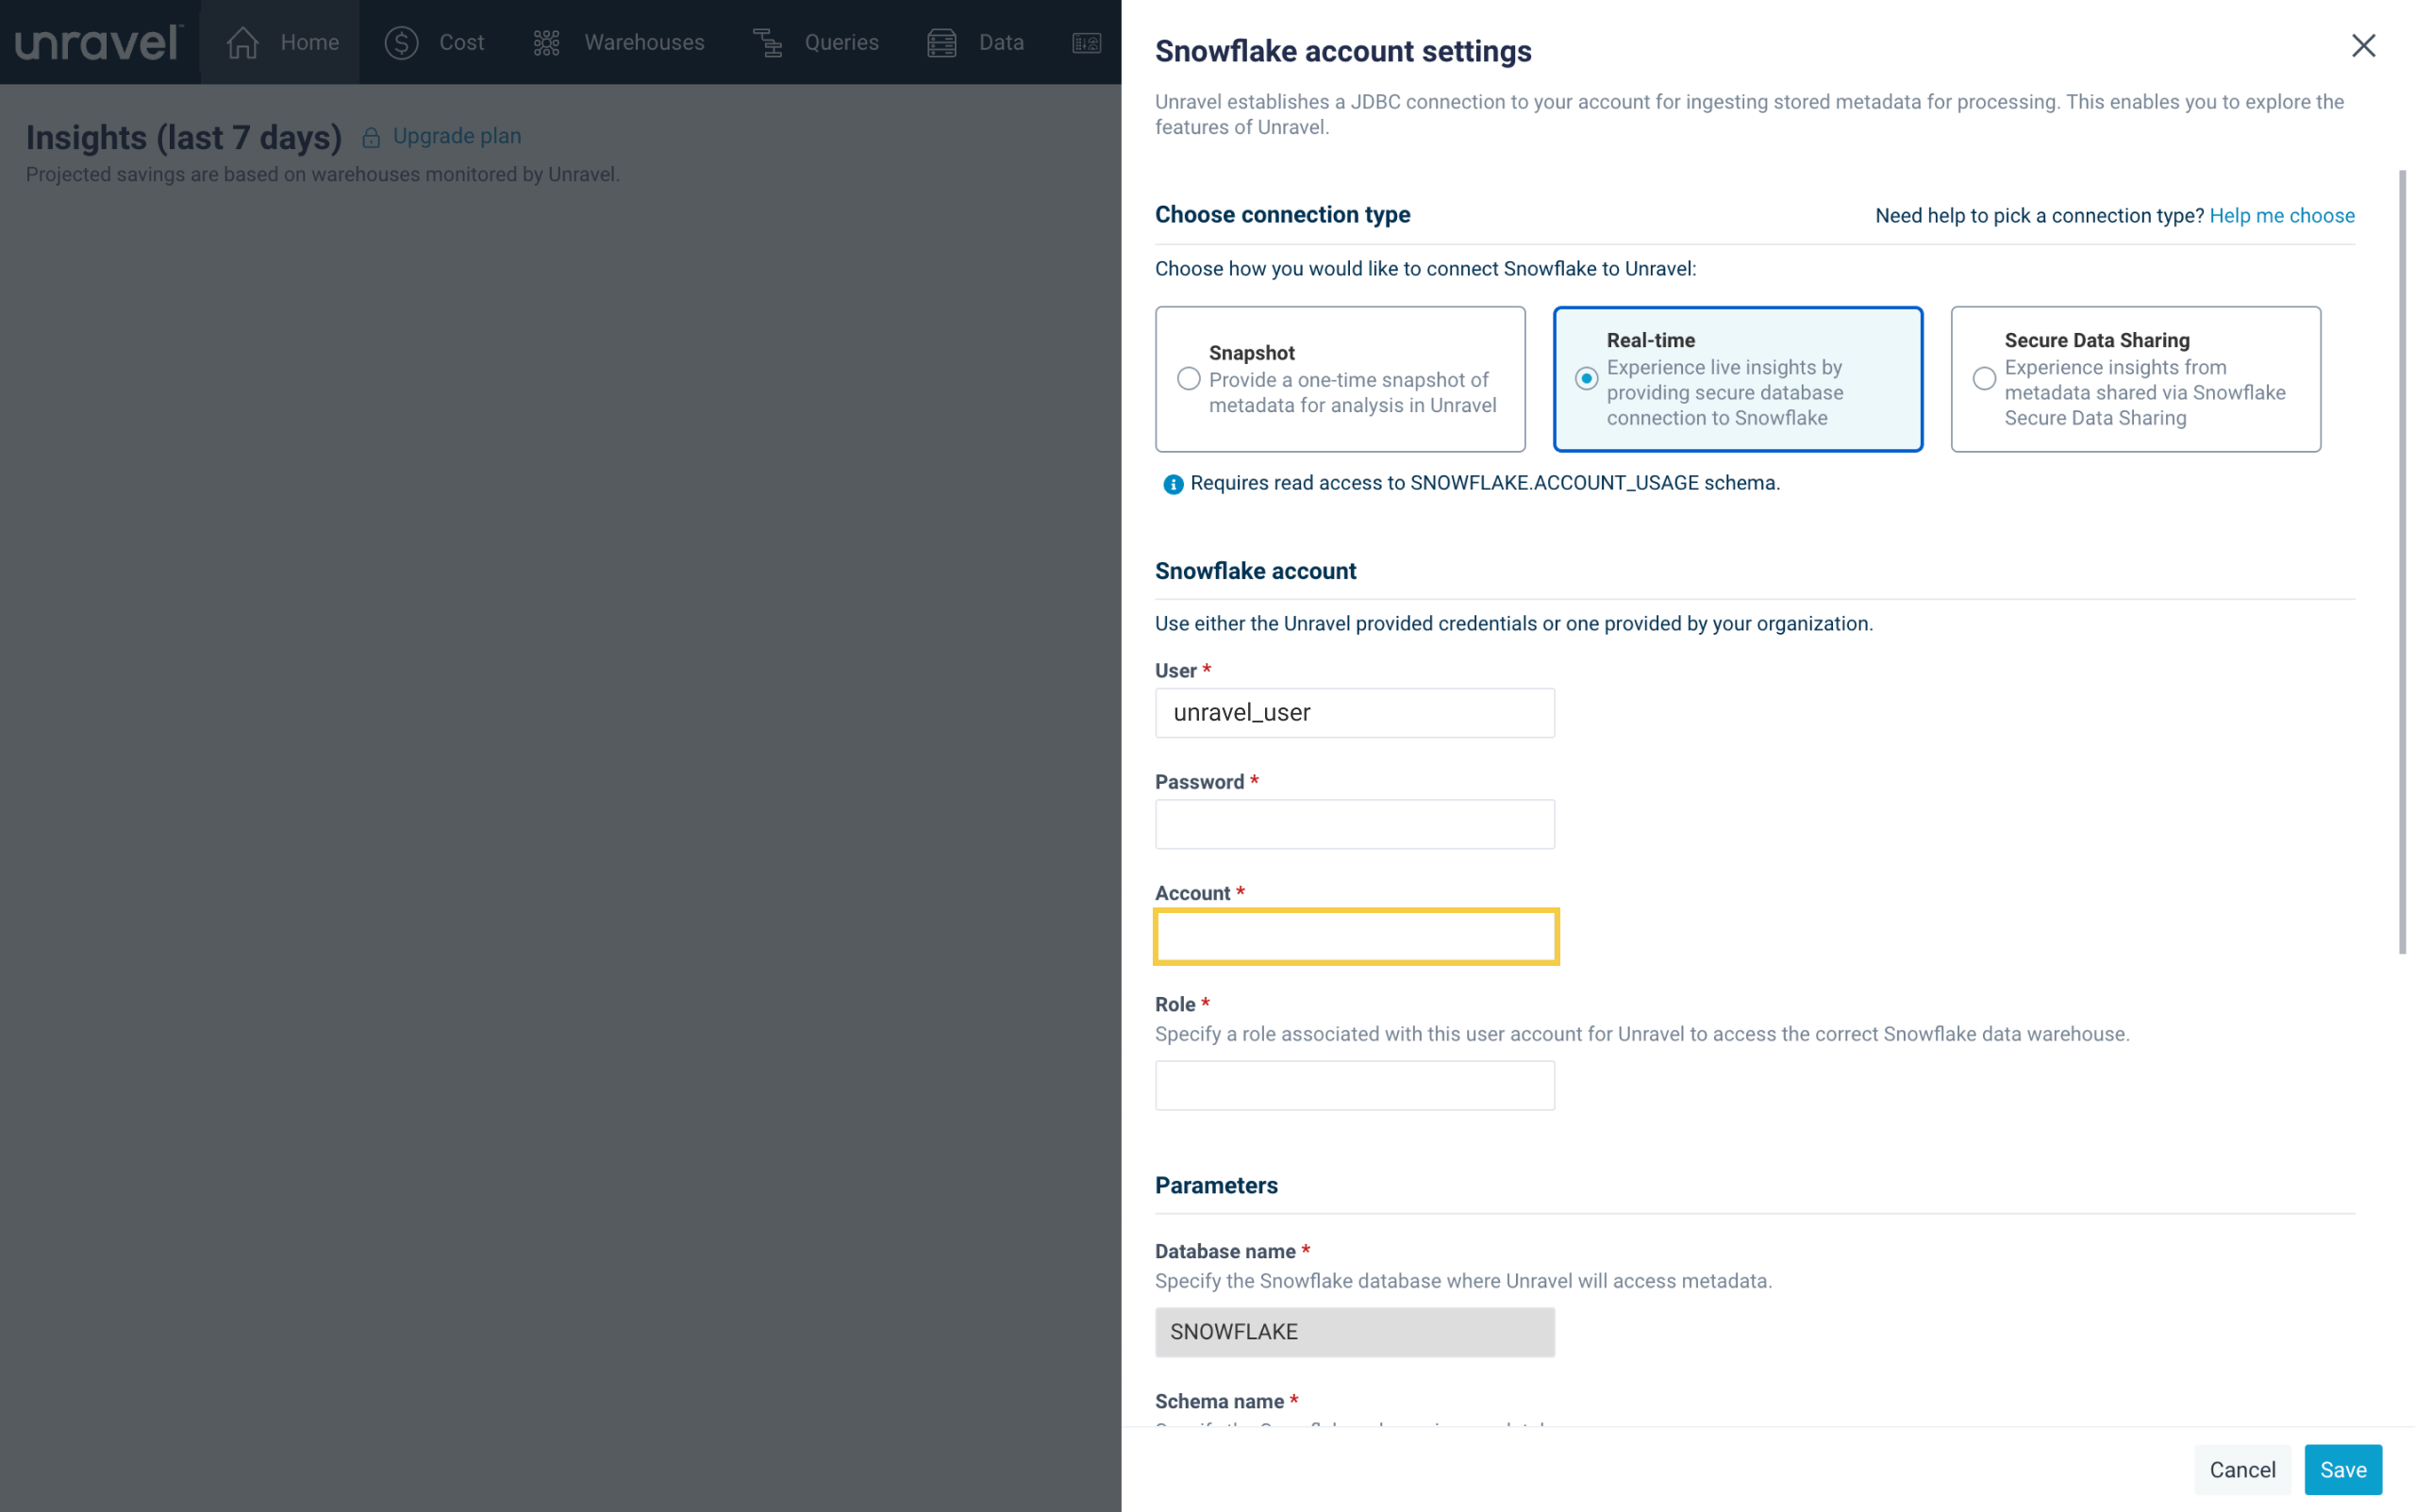
Select the Gear icon located in the upper right corner. Then from the dropdown, select the Snowflake configuration link.
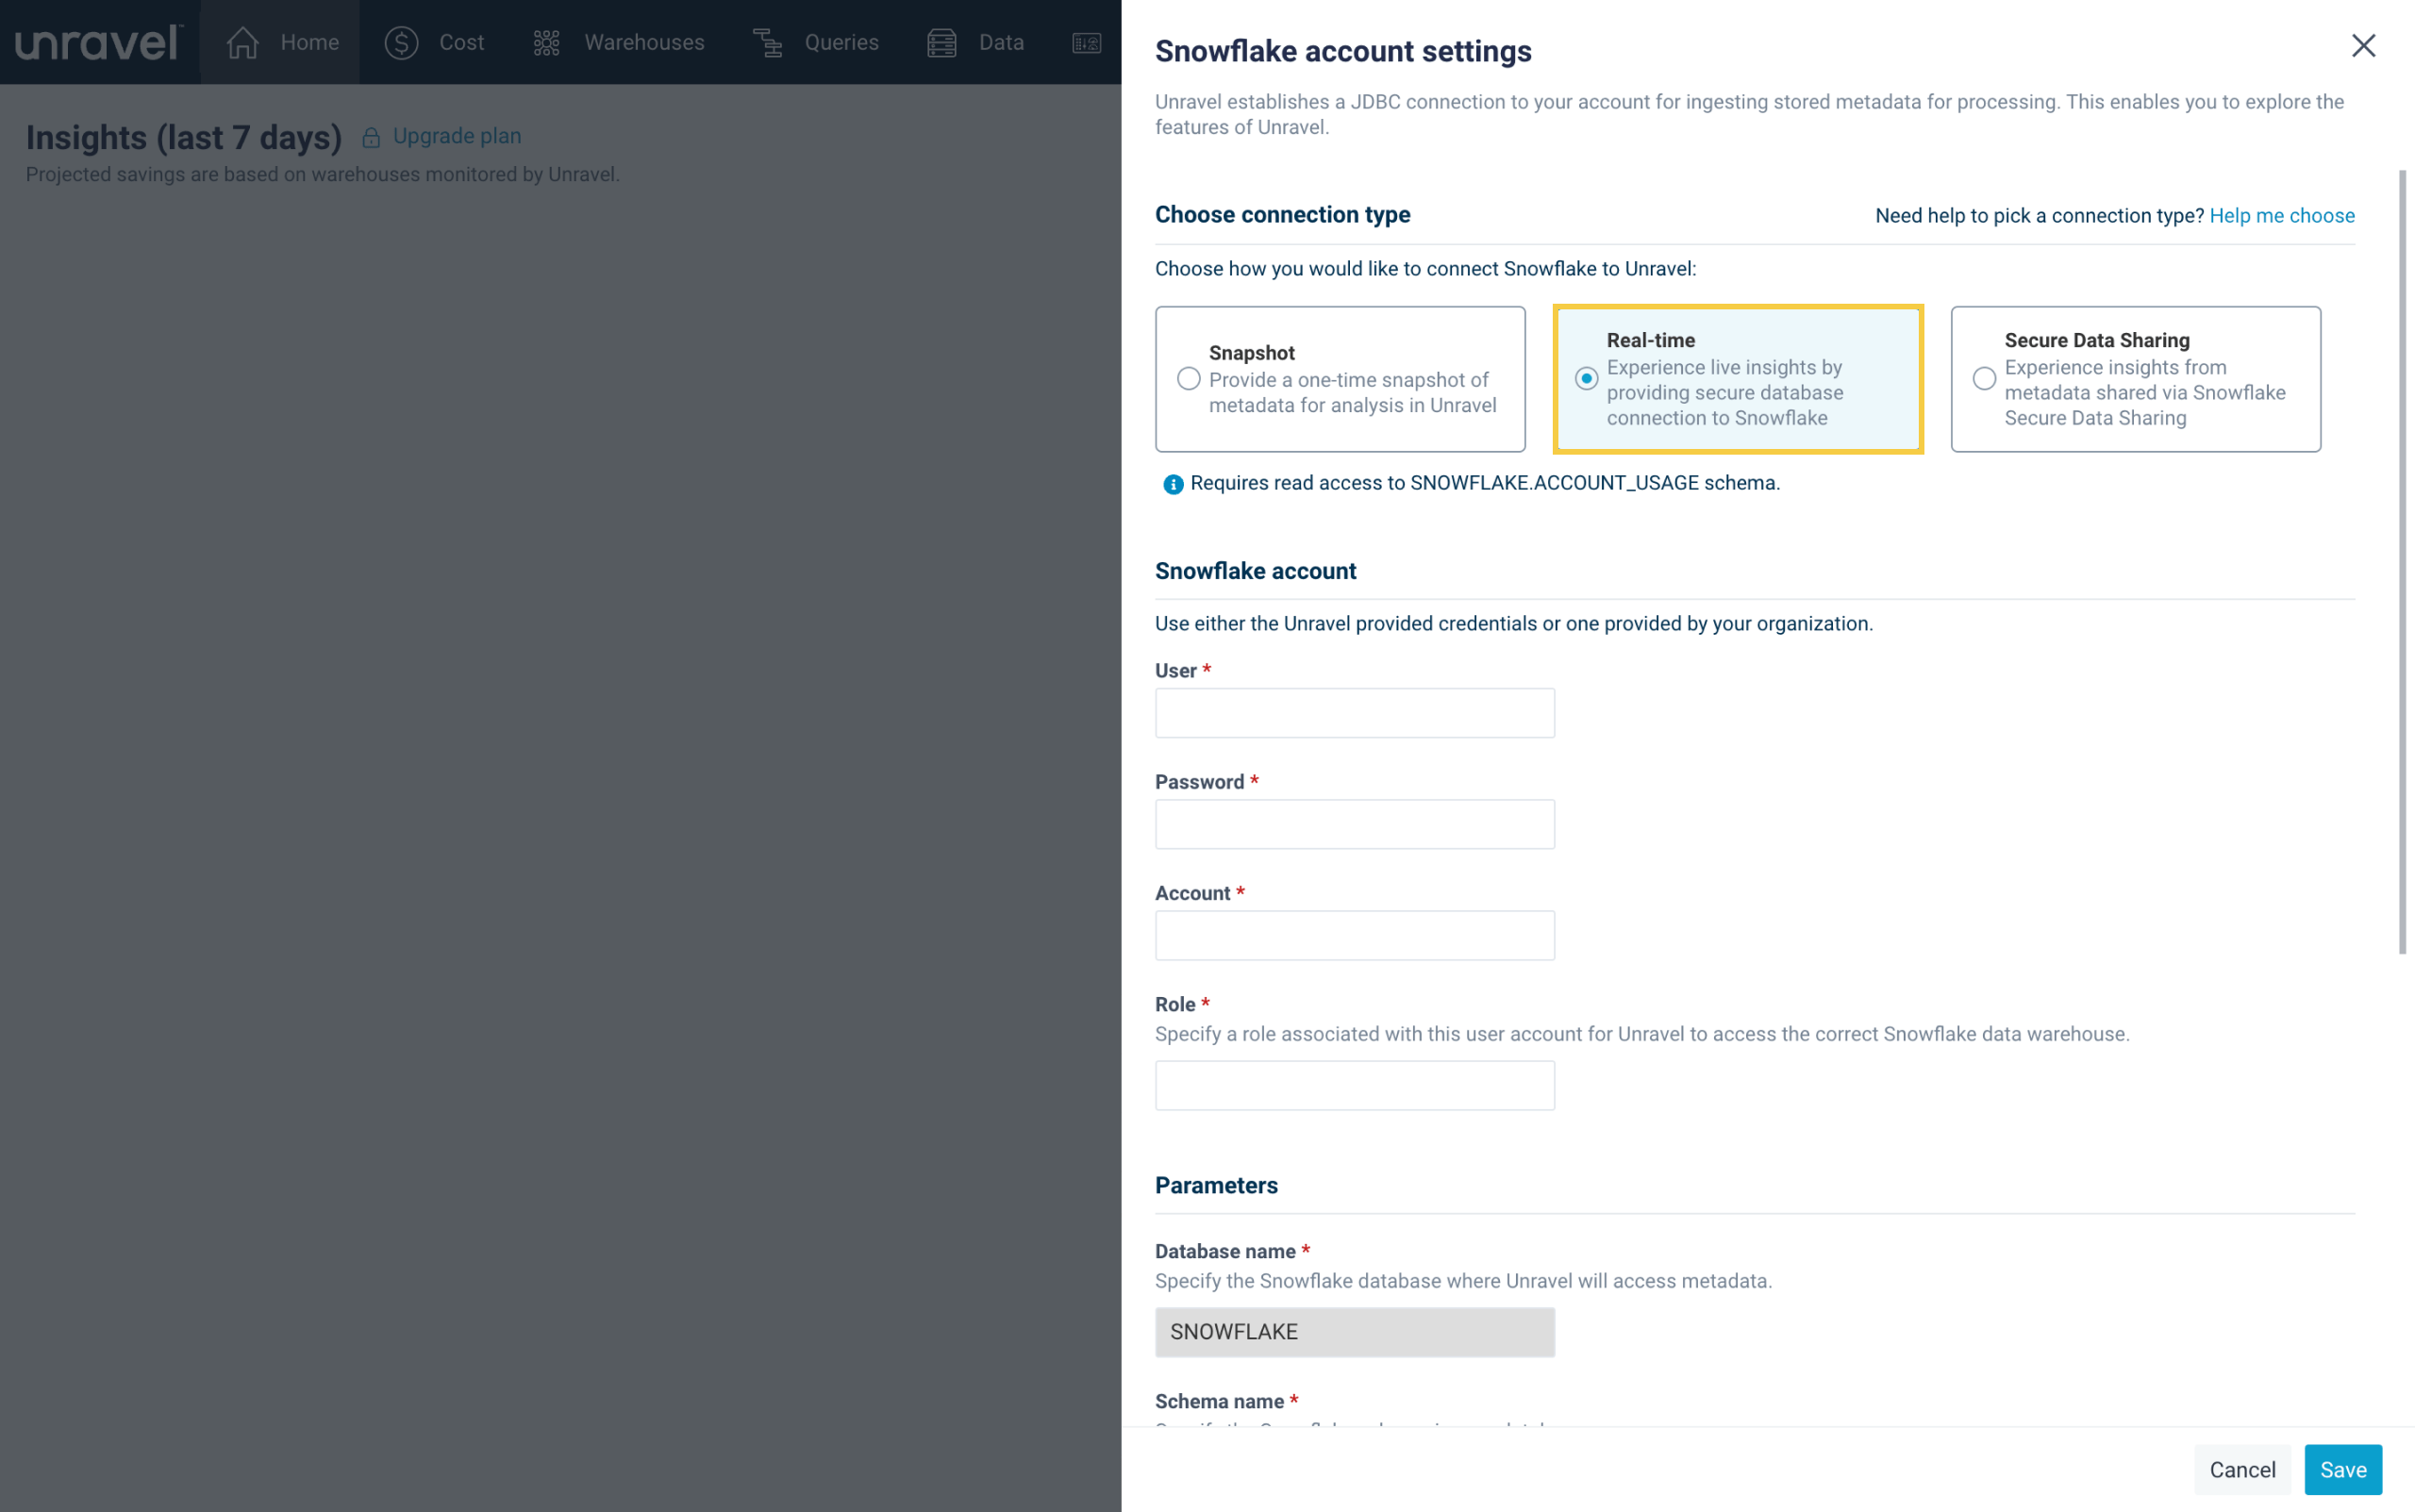
Submit the required inputs into the Snowflake configuration form.
In the Connection type section, select the Real-time option.
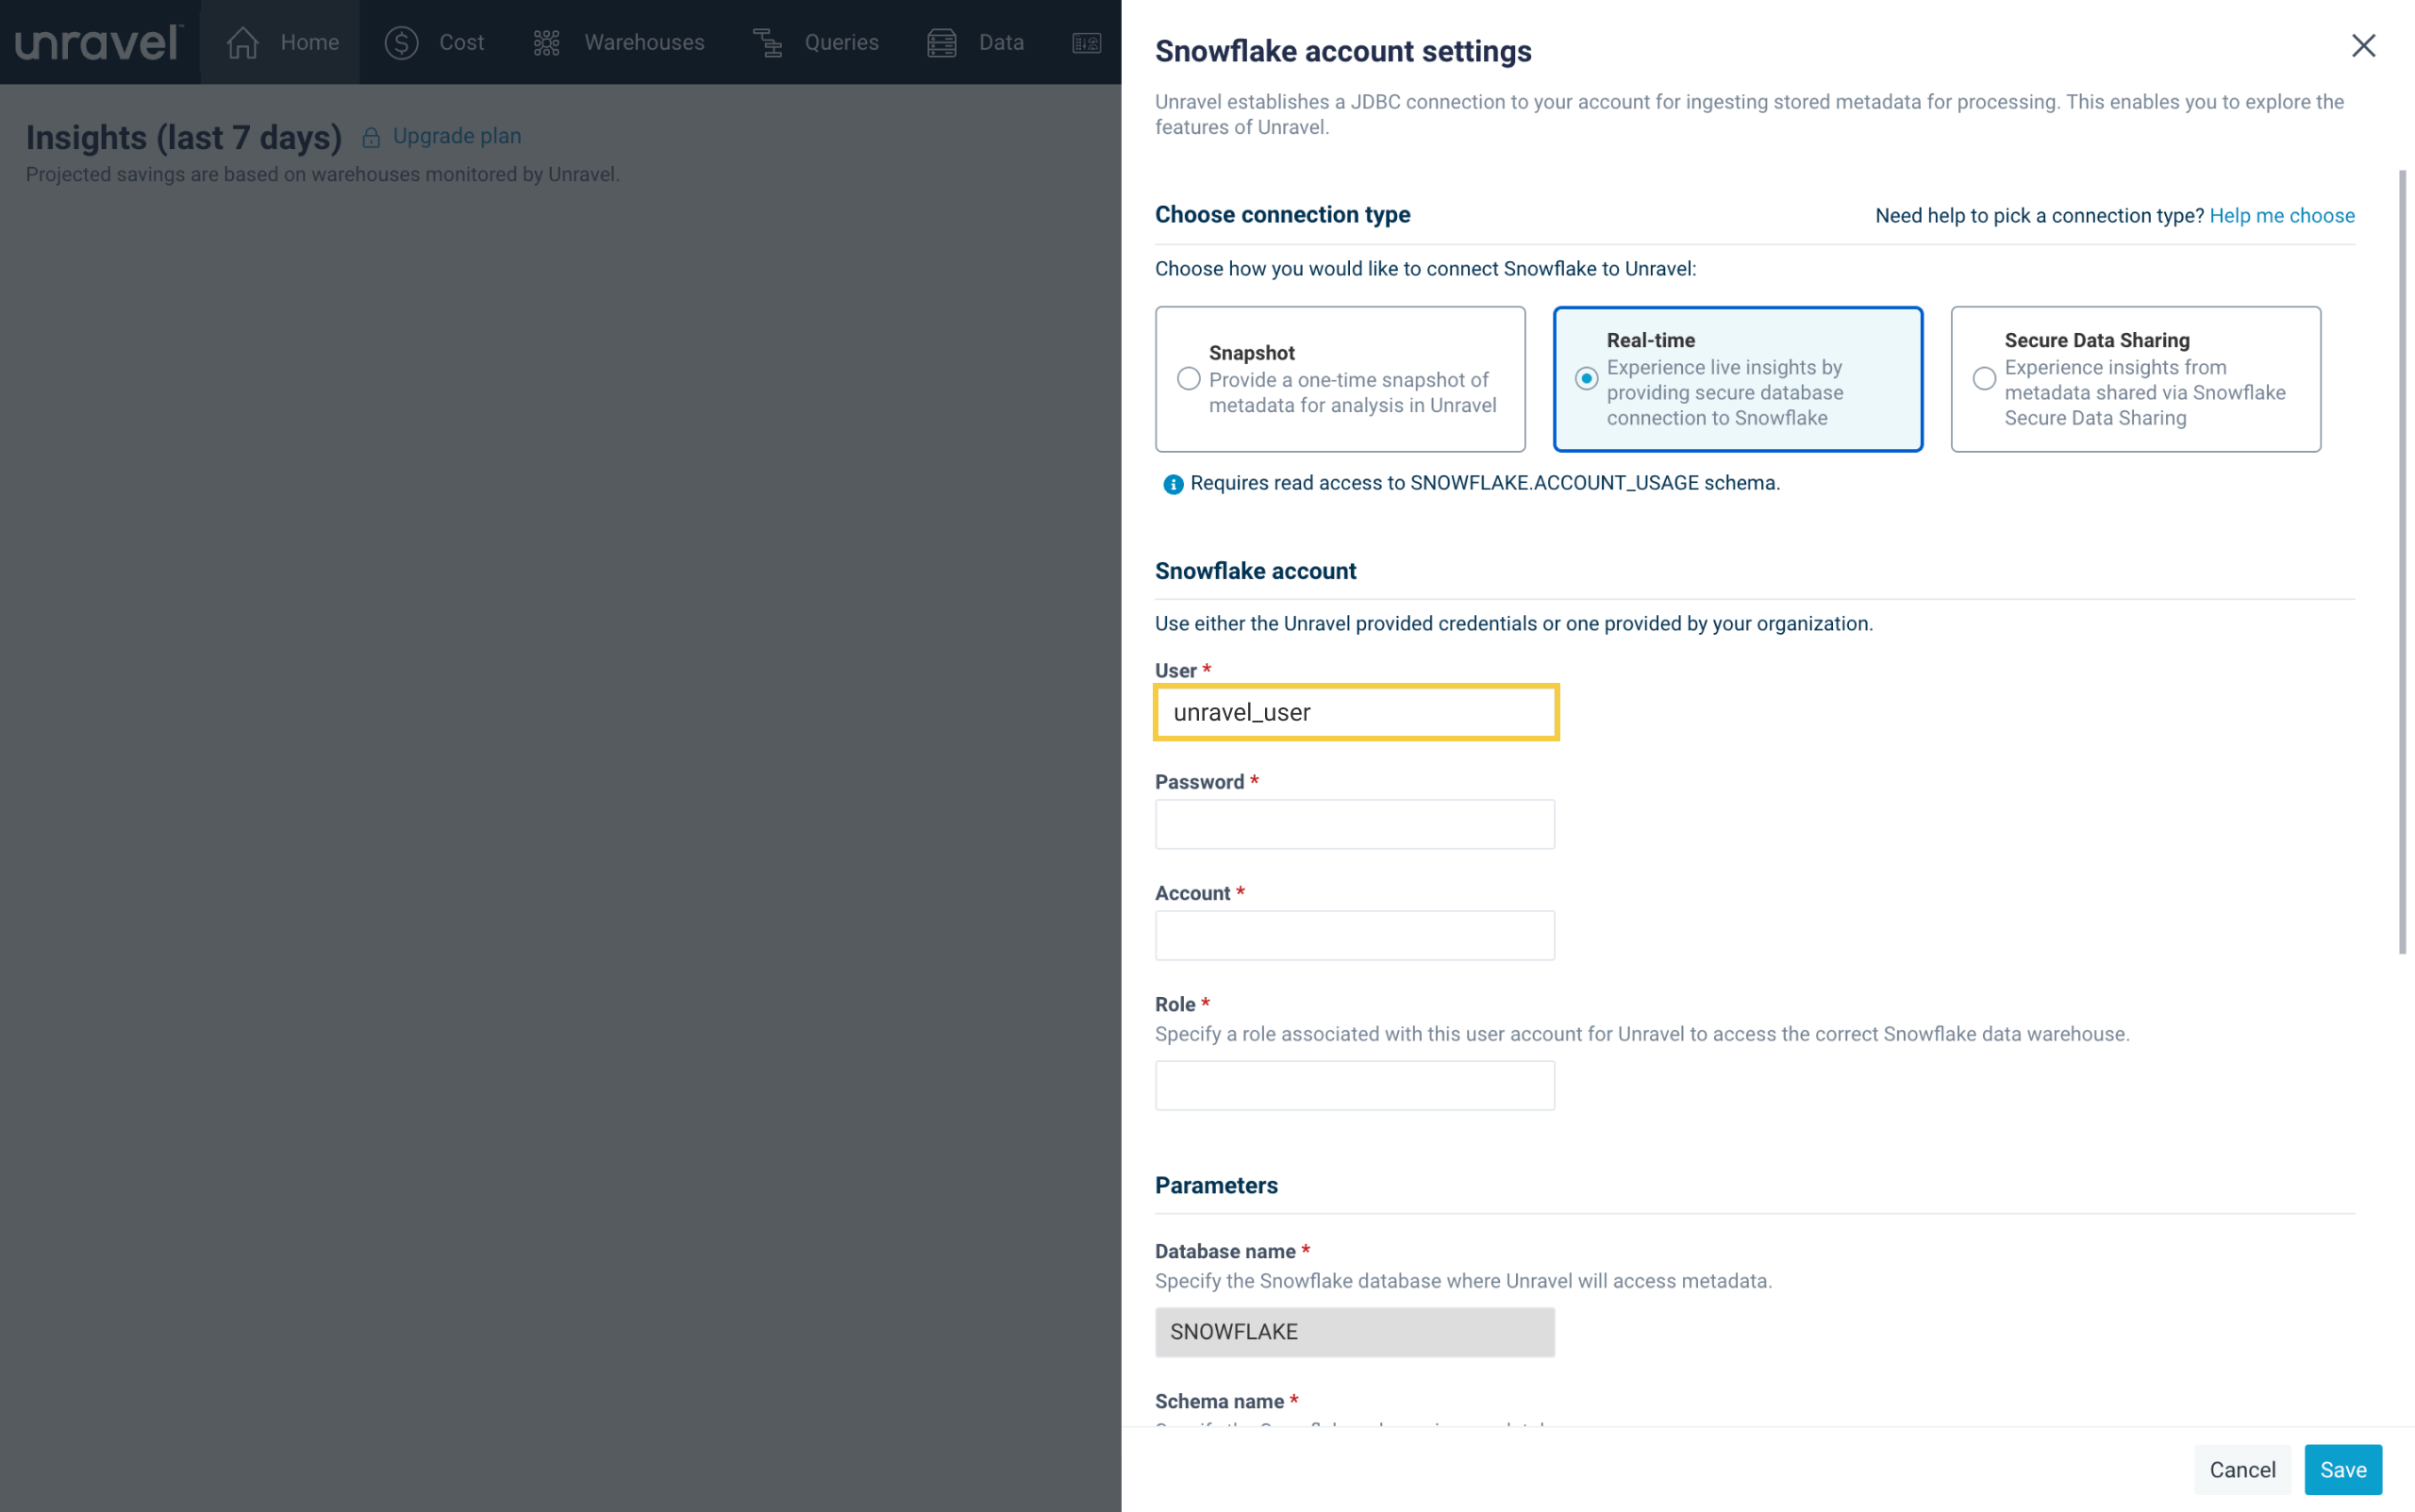
In the User field within the Snowflake account section, enter the value of the new Snowflake username created in the previous step. This value should be unravel_user if you used the provided code snippet in the previous step.
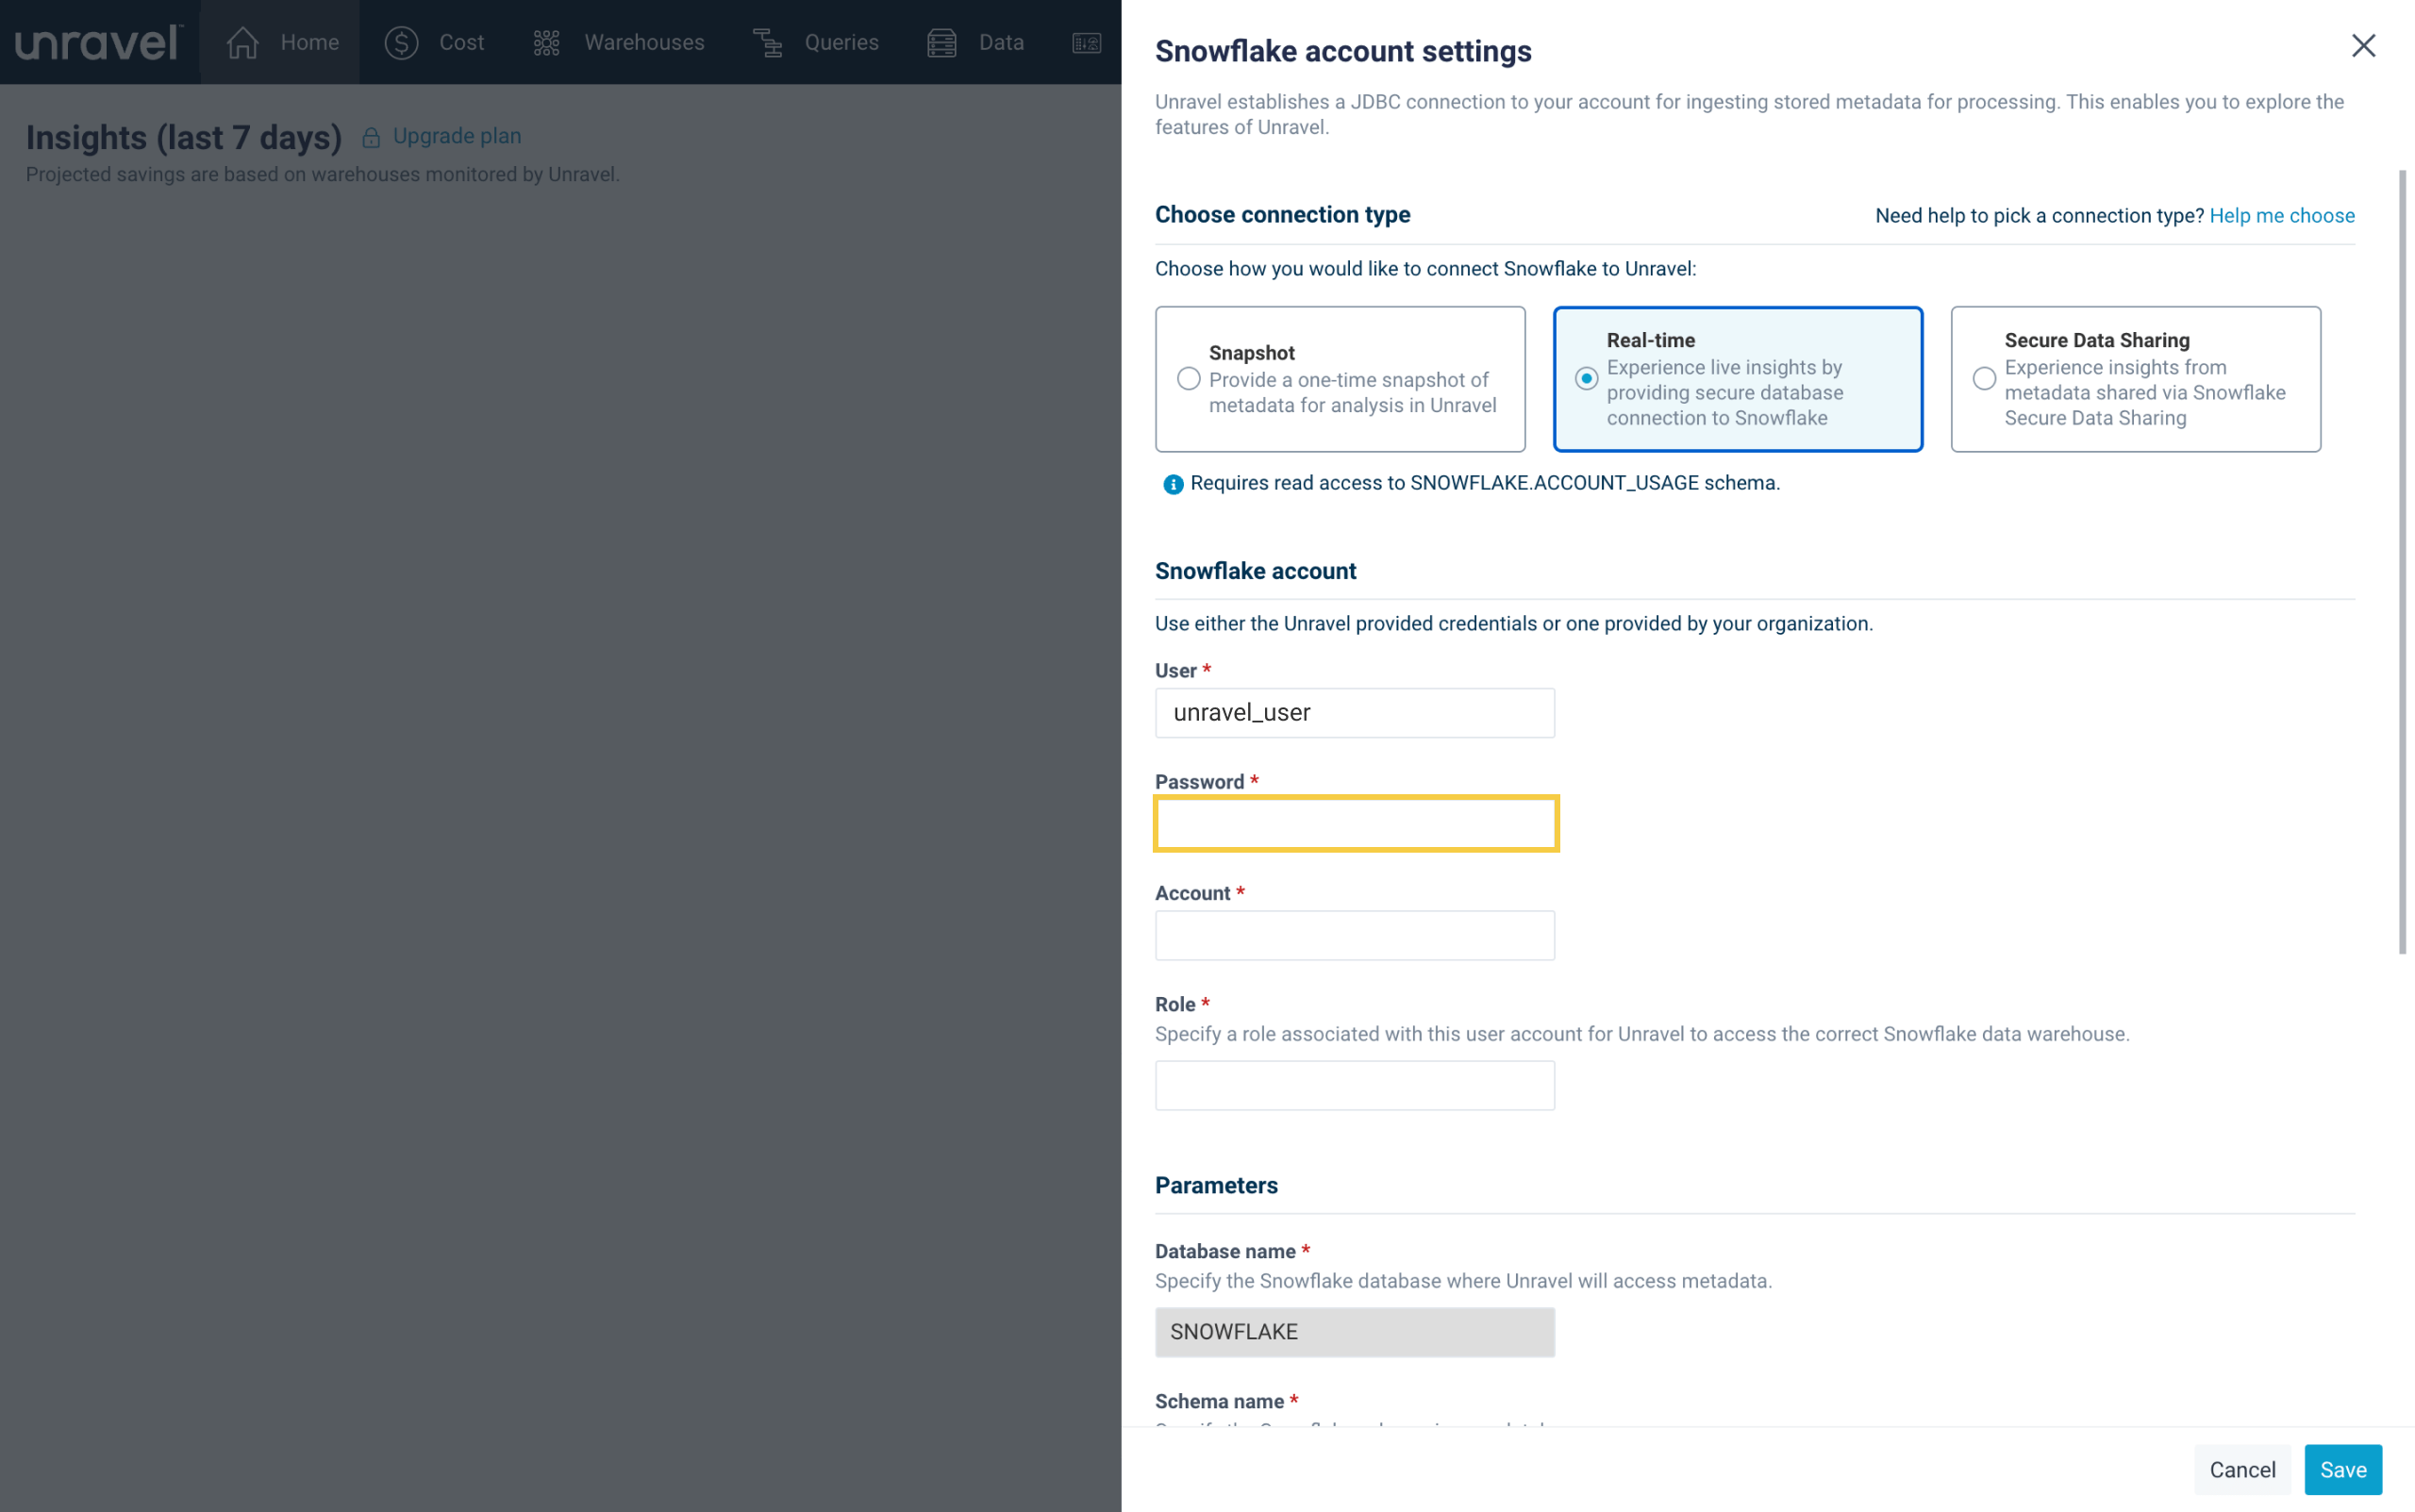
In the Password field, enter the value of your Snowflake account password assigned to the new user created in the previous step.
In the Account field, enter the Snowflake account ID from which you want Unravel to fetch real-time telemetry data. See tip below on how to locate it.
TIP
The quickest way to locate your Snowflake account ID is to copy it from the web URL. Sign in to your Snowflake account and look at the URL displayed in your browser’s address bar. The account ID is the long series of letters and numbers displayed towards the end of the web URL. For example, in this URL: https://app.snowflake.com/unnmtdp/rab52145/worksheets, the Snowflake account ID is rab52145.
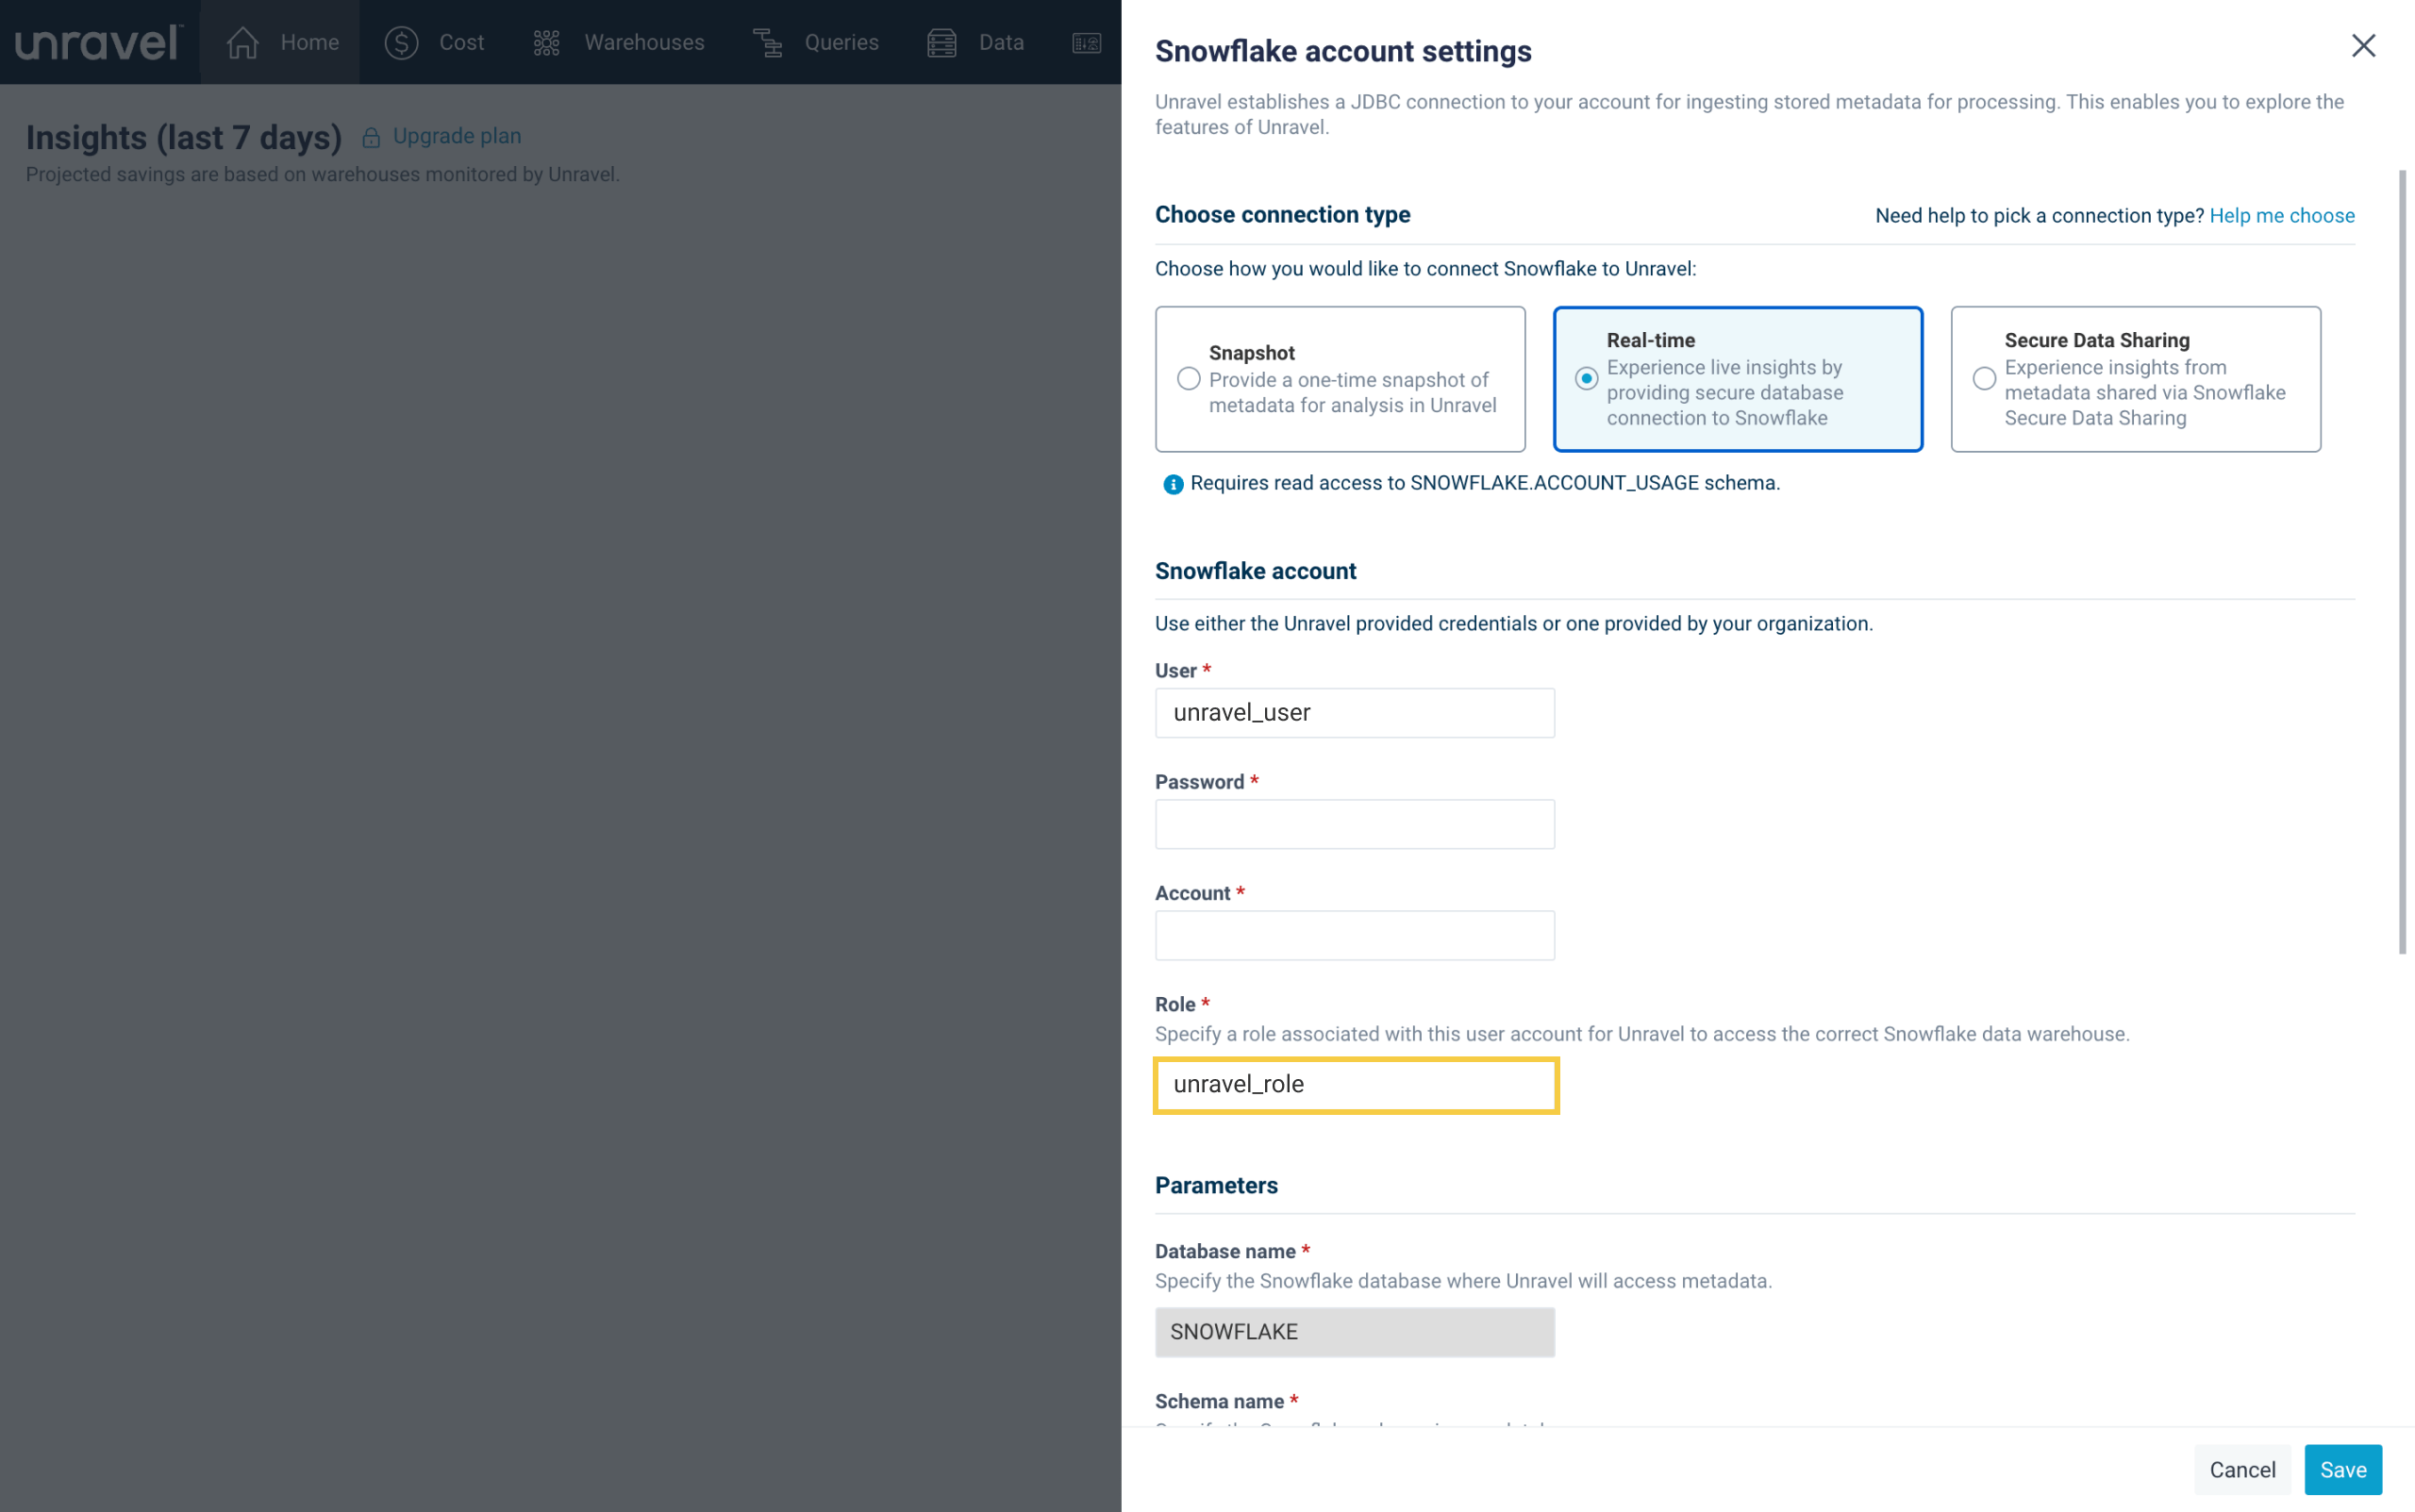
In the Role field, enter the value of the new Snowflake role created in the previous step. This value should be unravel_role if you used the provided code snippet in the previous step.
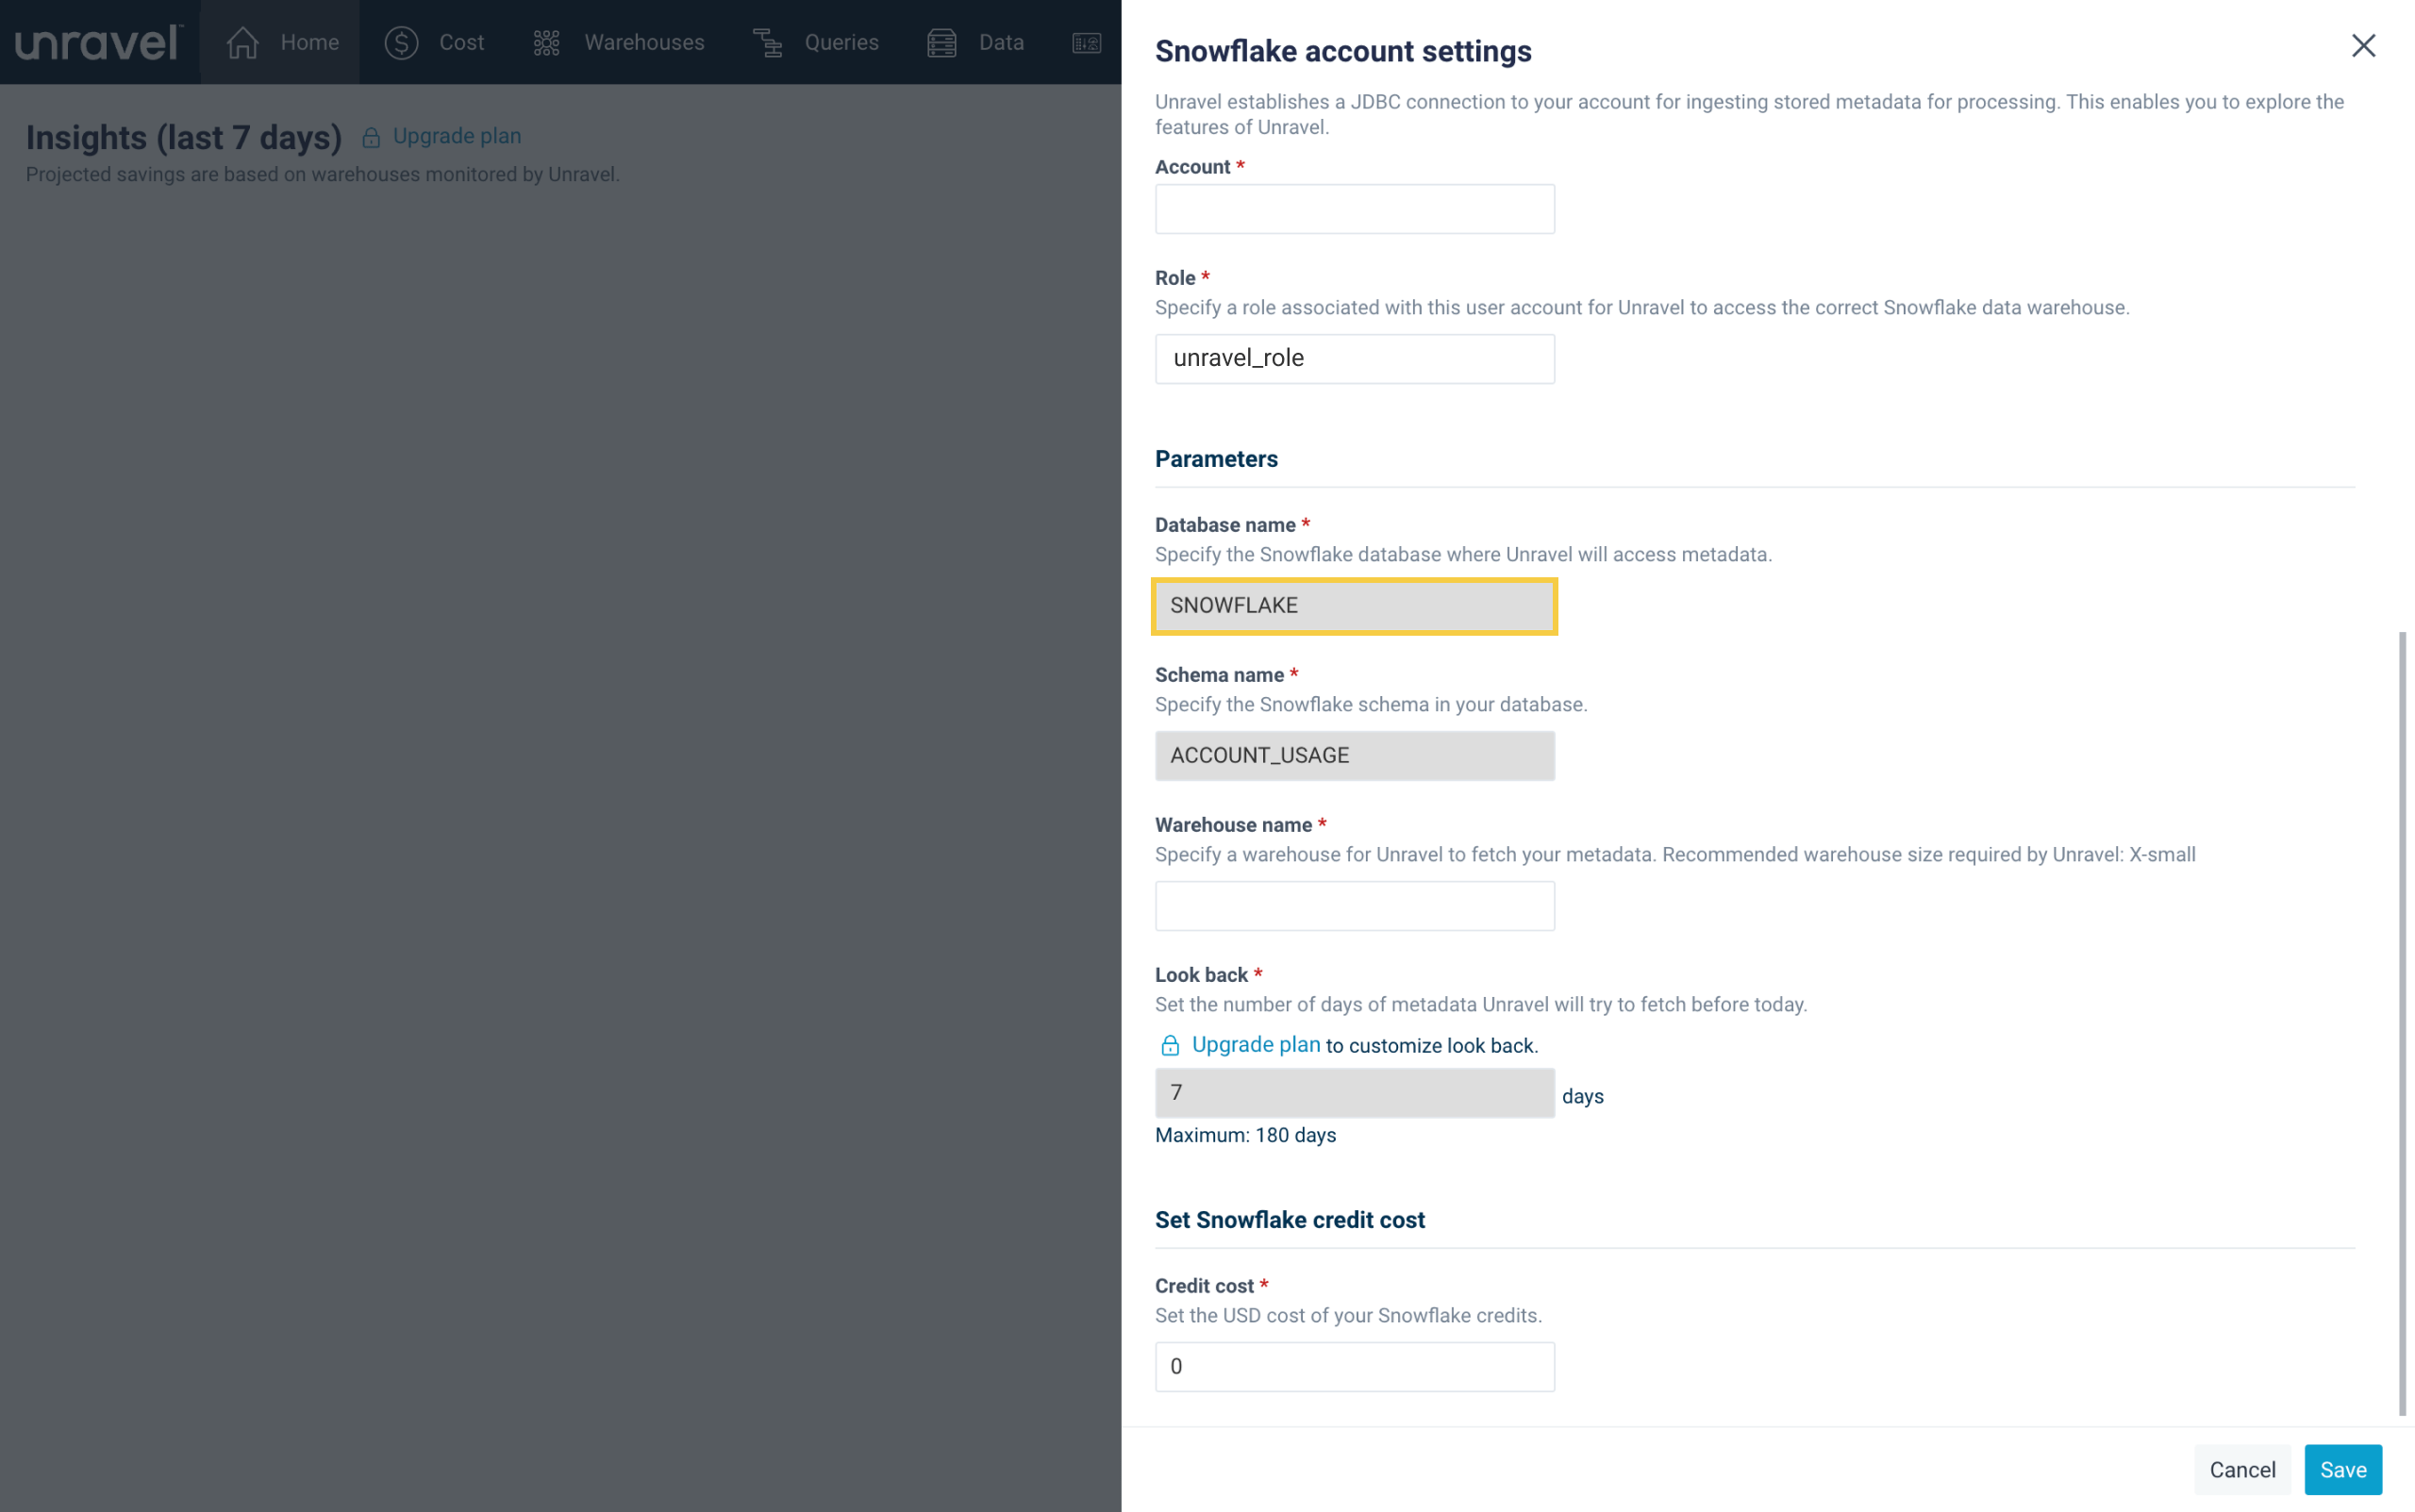
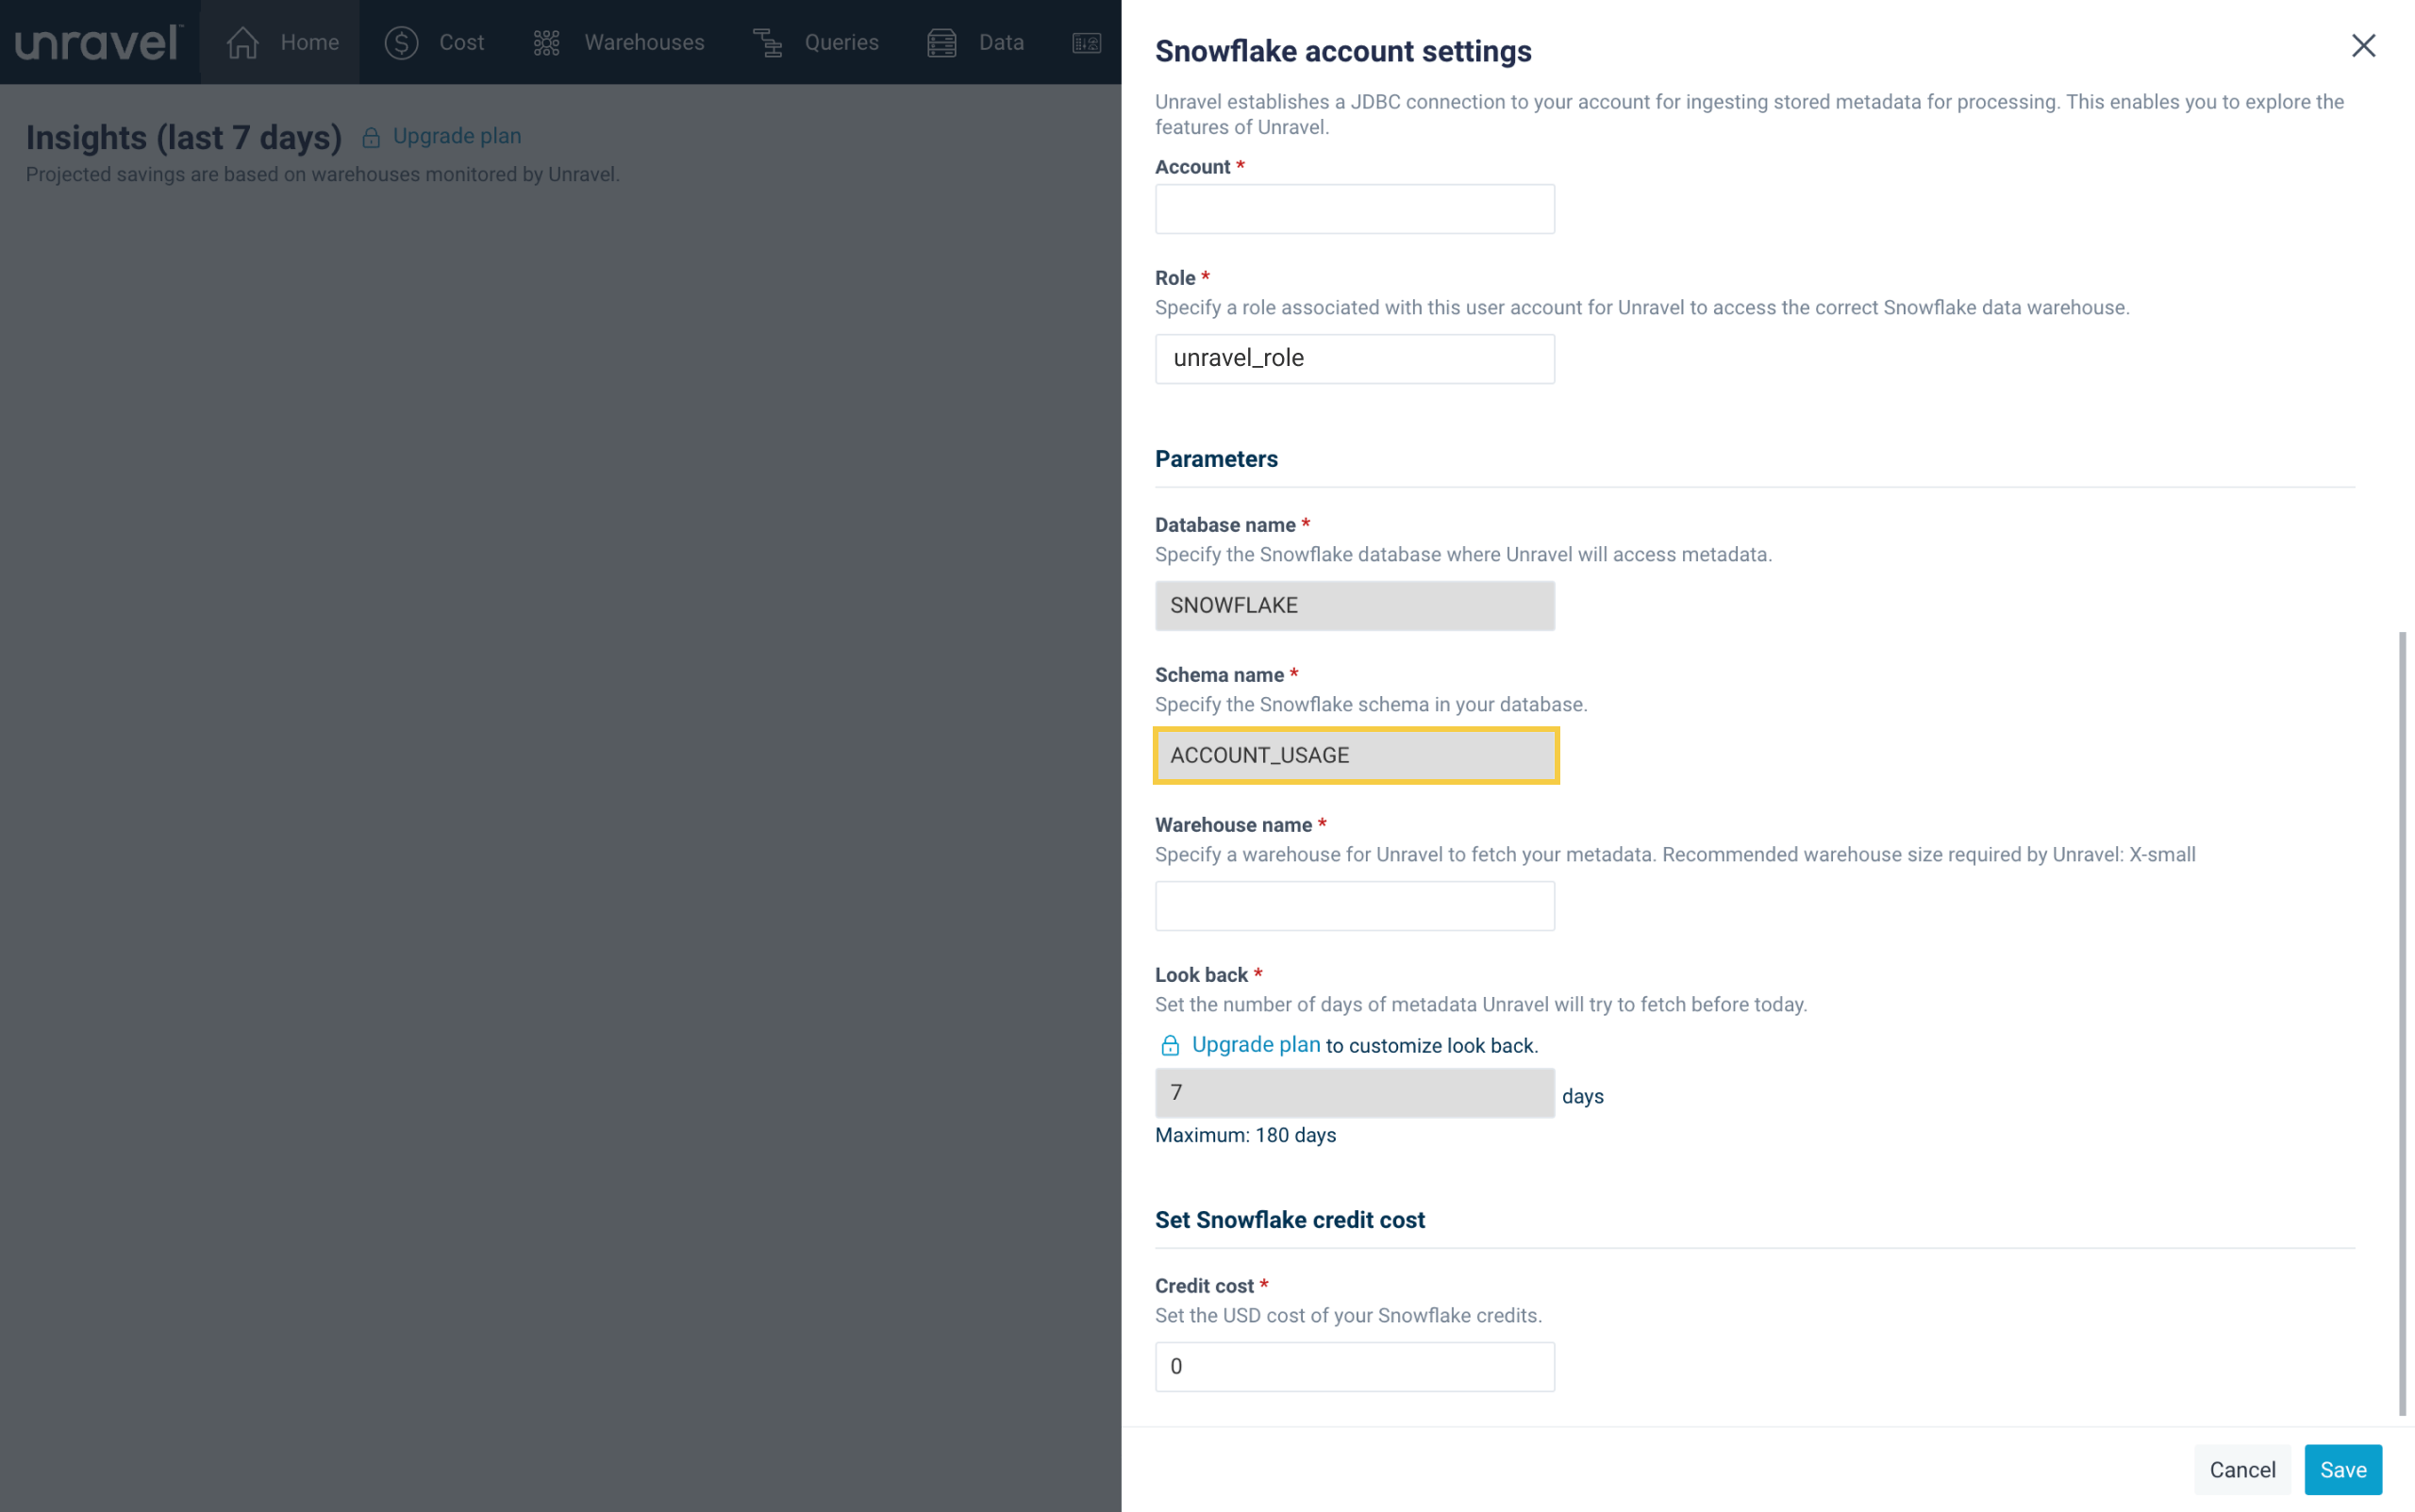
The Database name field within the Parameters section is populated for you. Move on to the next step.
The Schema name field is populated for you. Move on to the next step.
The Warehouse name field, enter the value of your Snowflake warehouse name for Unravel to run queries on your metadata (monitor and telemetry data). The minimum warehouse size required by Unravel is X-small. This value should be COMPUTE_WH for the default settings in Snowflake.
The Look back field is populated for you. For Unravel Data Standard plans, this field is restricted to 7 days. Move on to the next step.
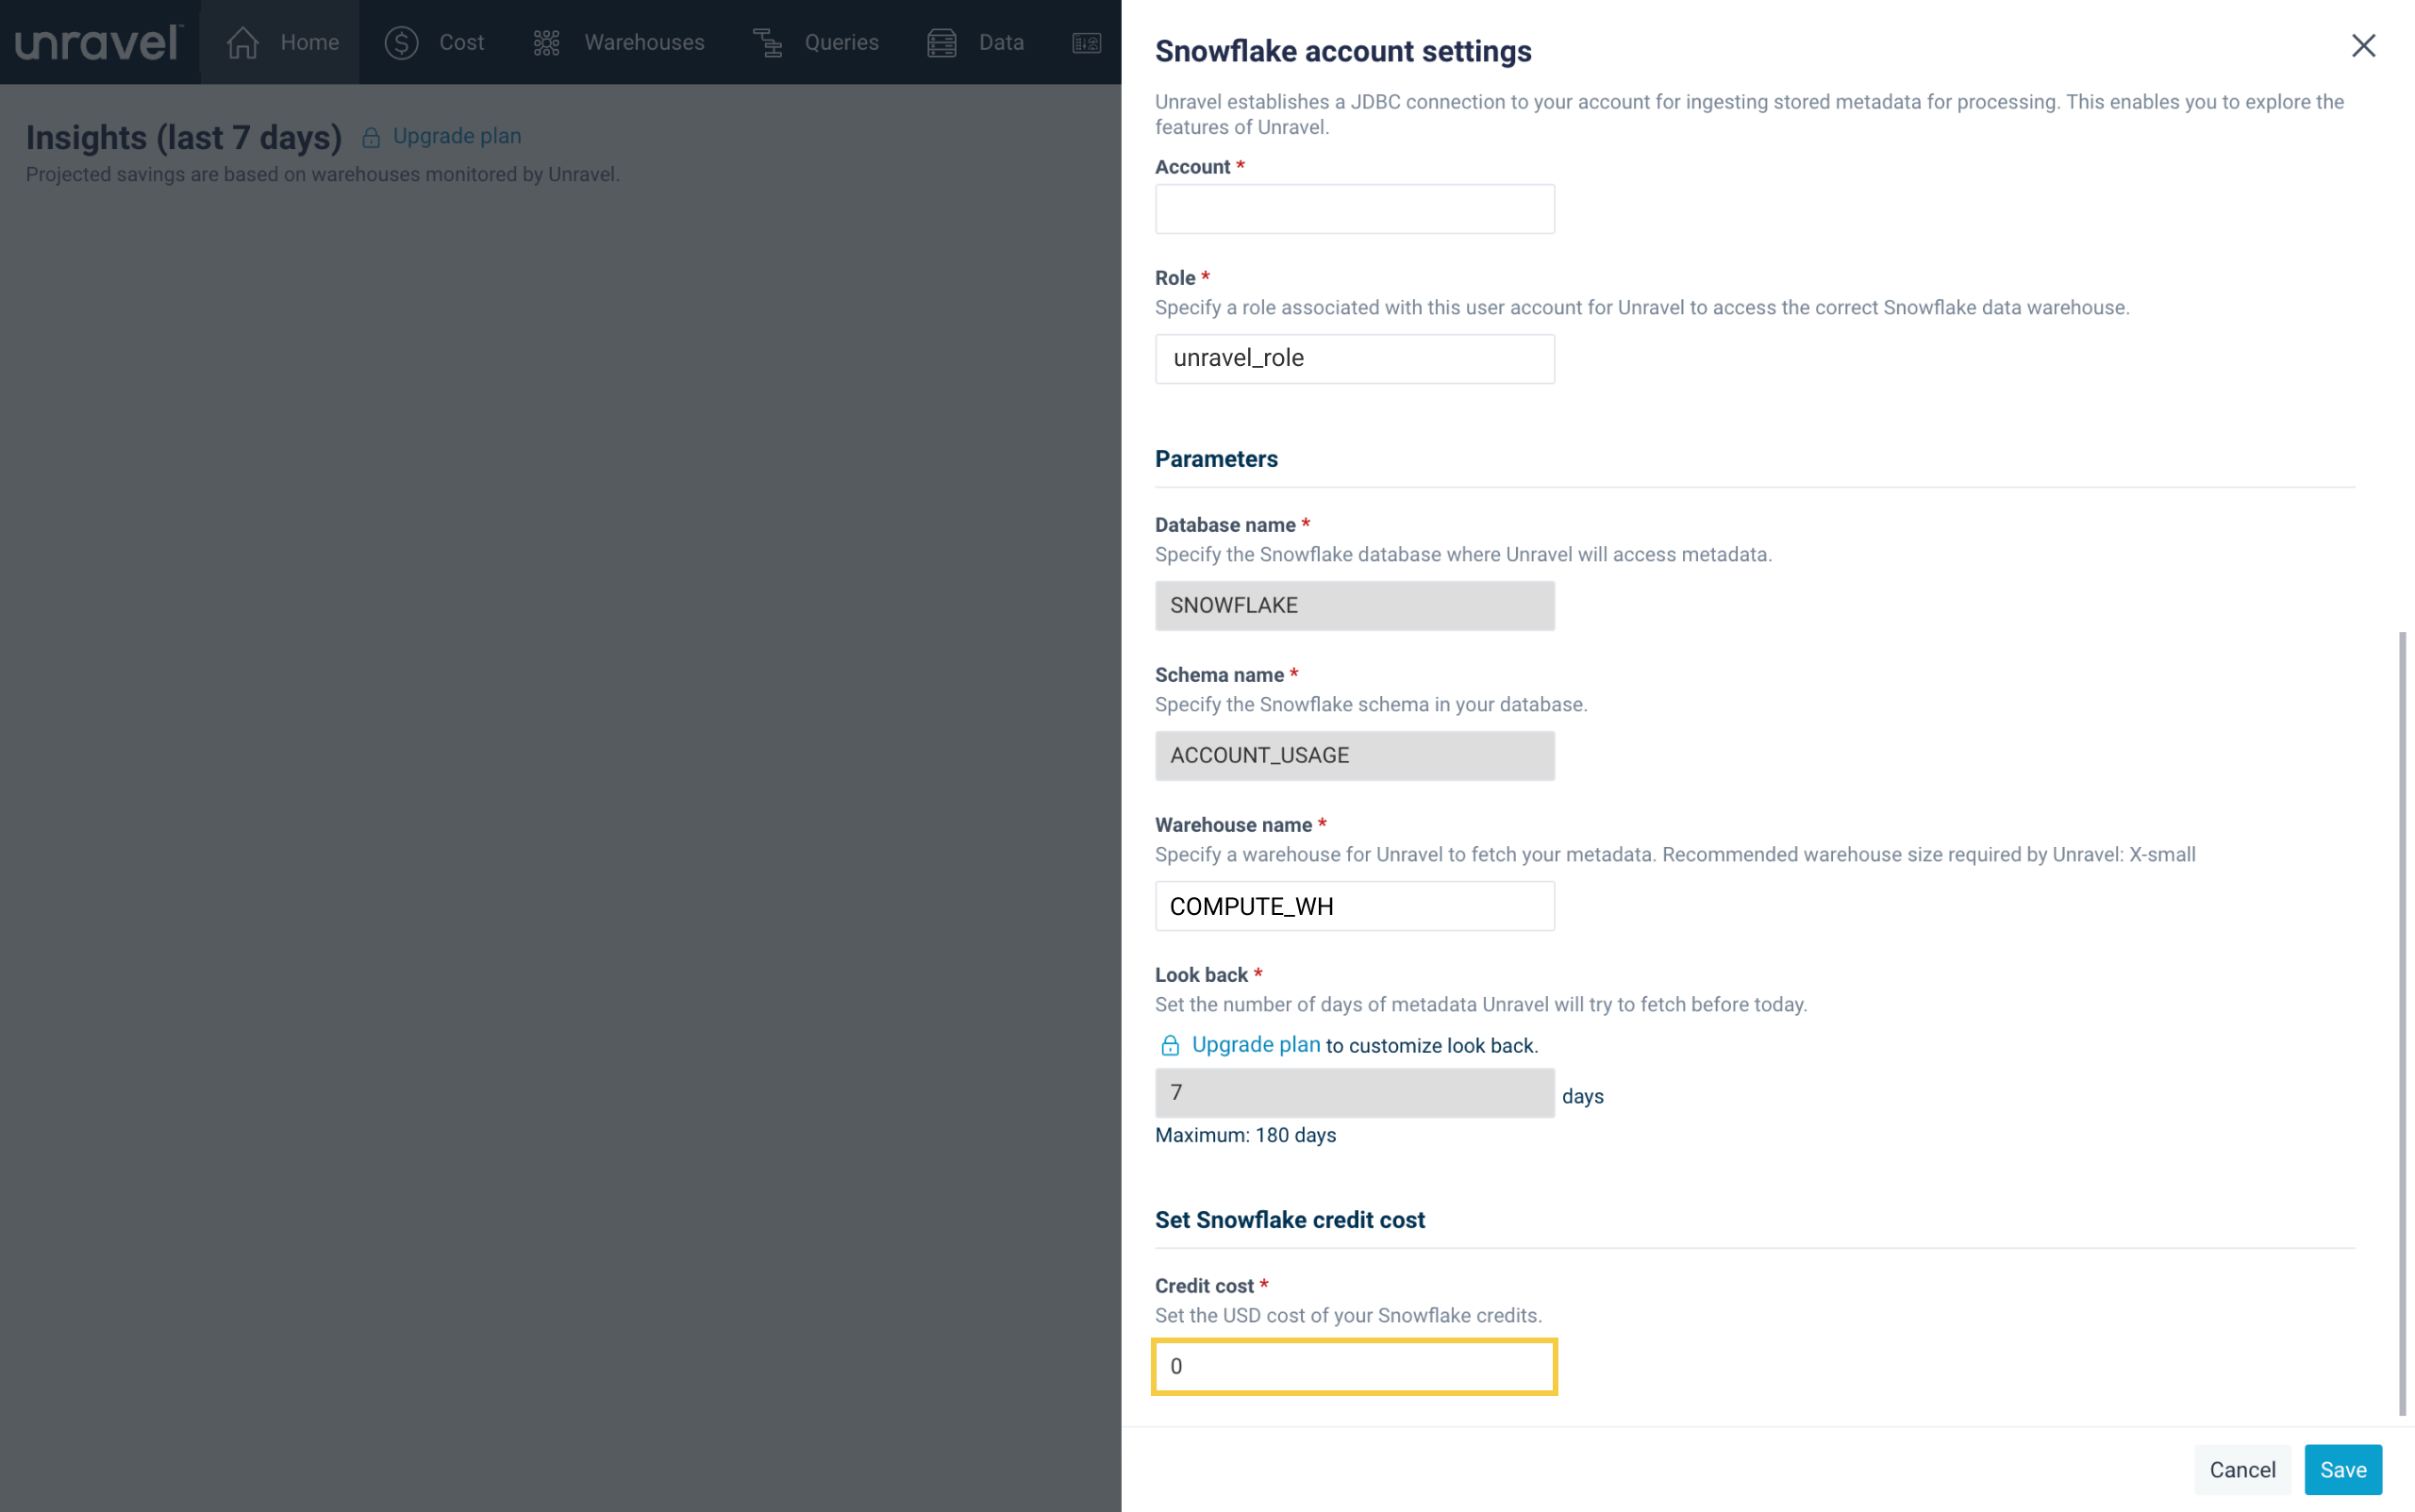
In the Credit cost field within the Set Snowflake credit cost section, enter the costs of your Snowflake credits in United States Dollars (USD).
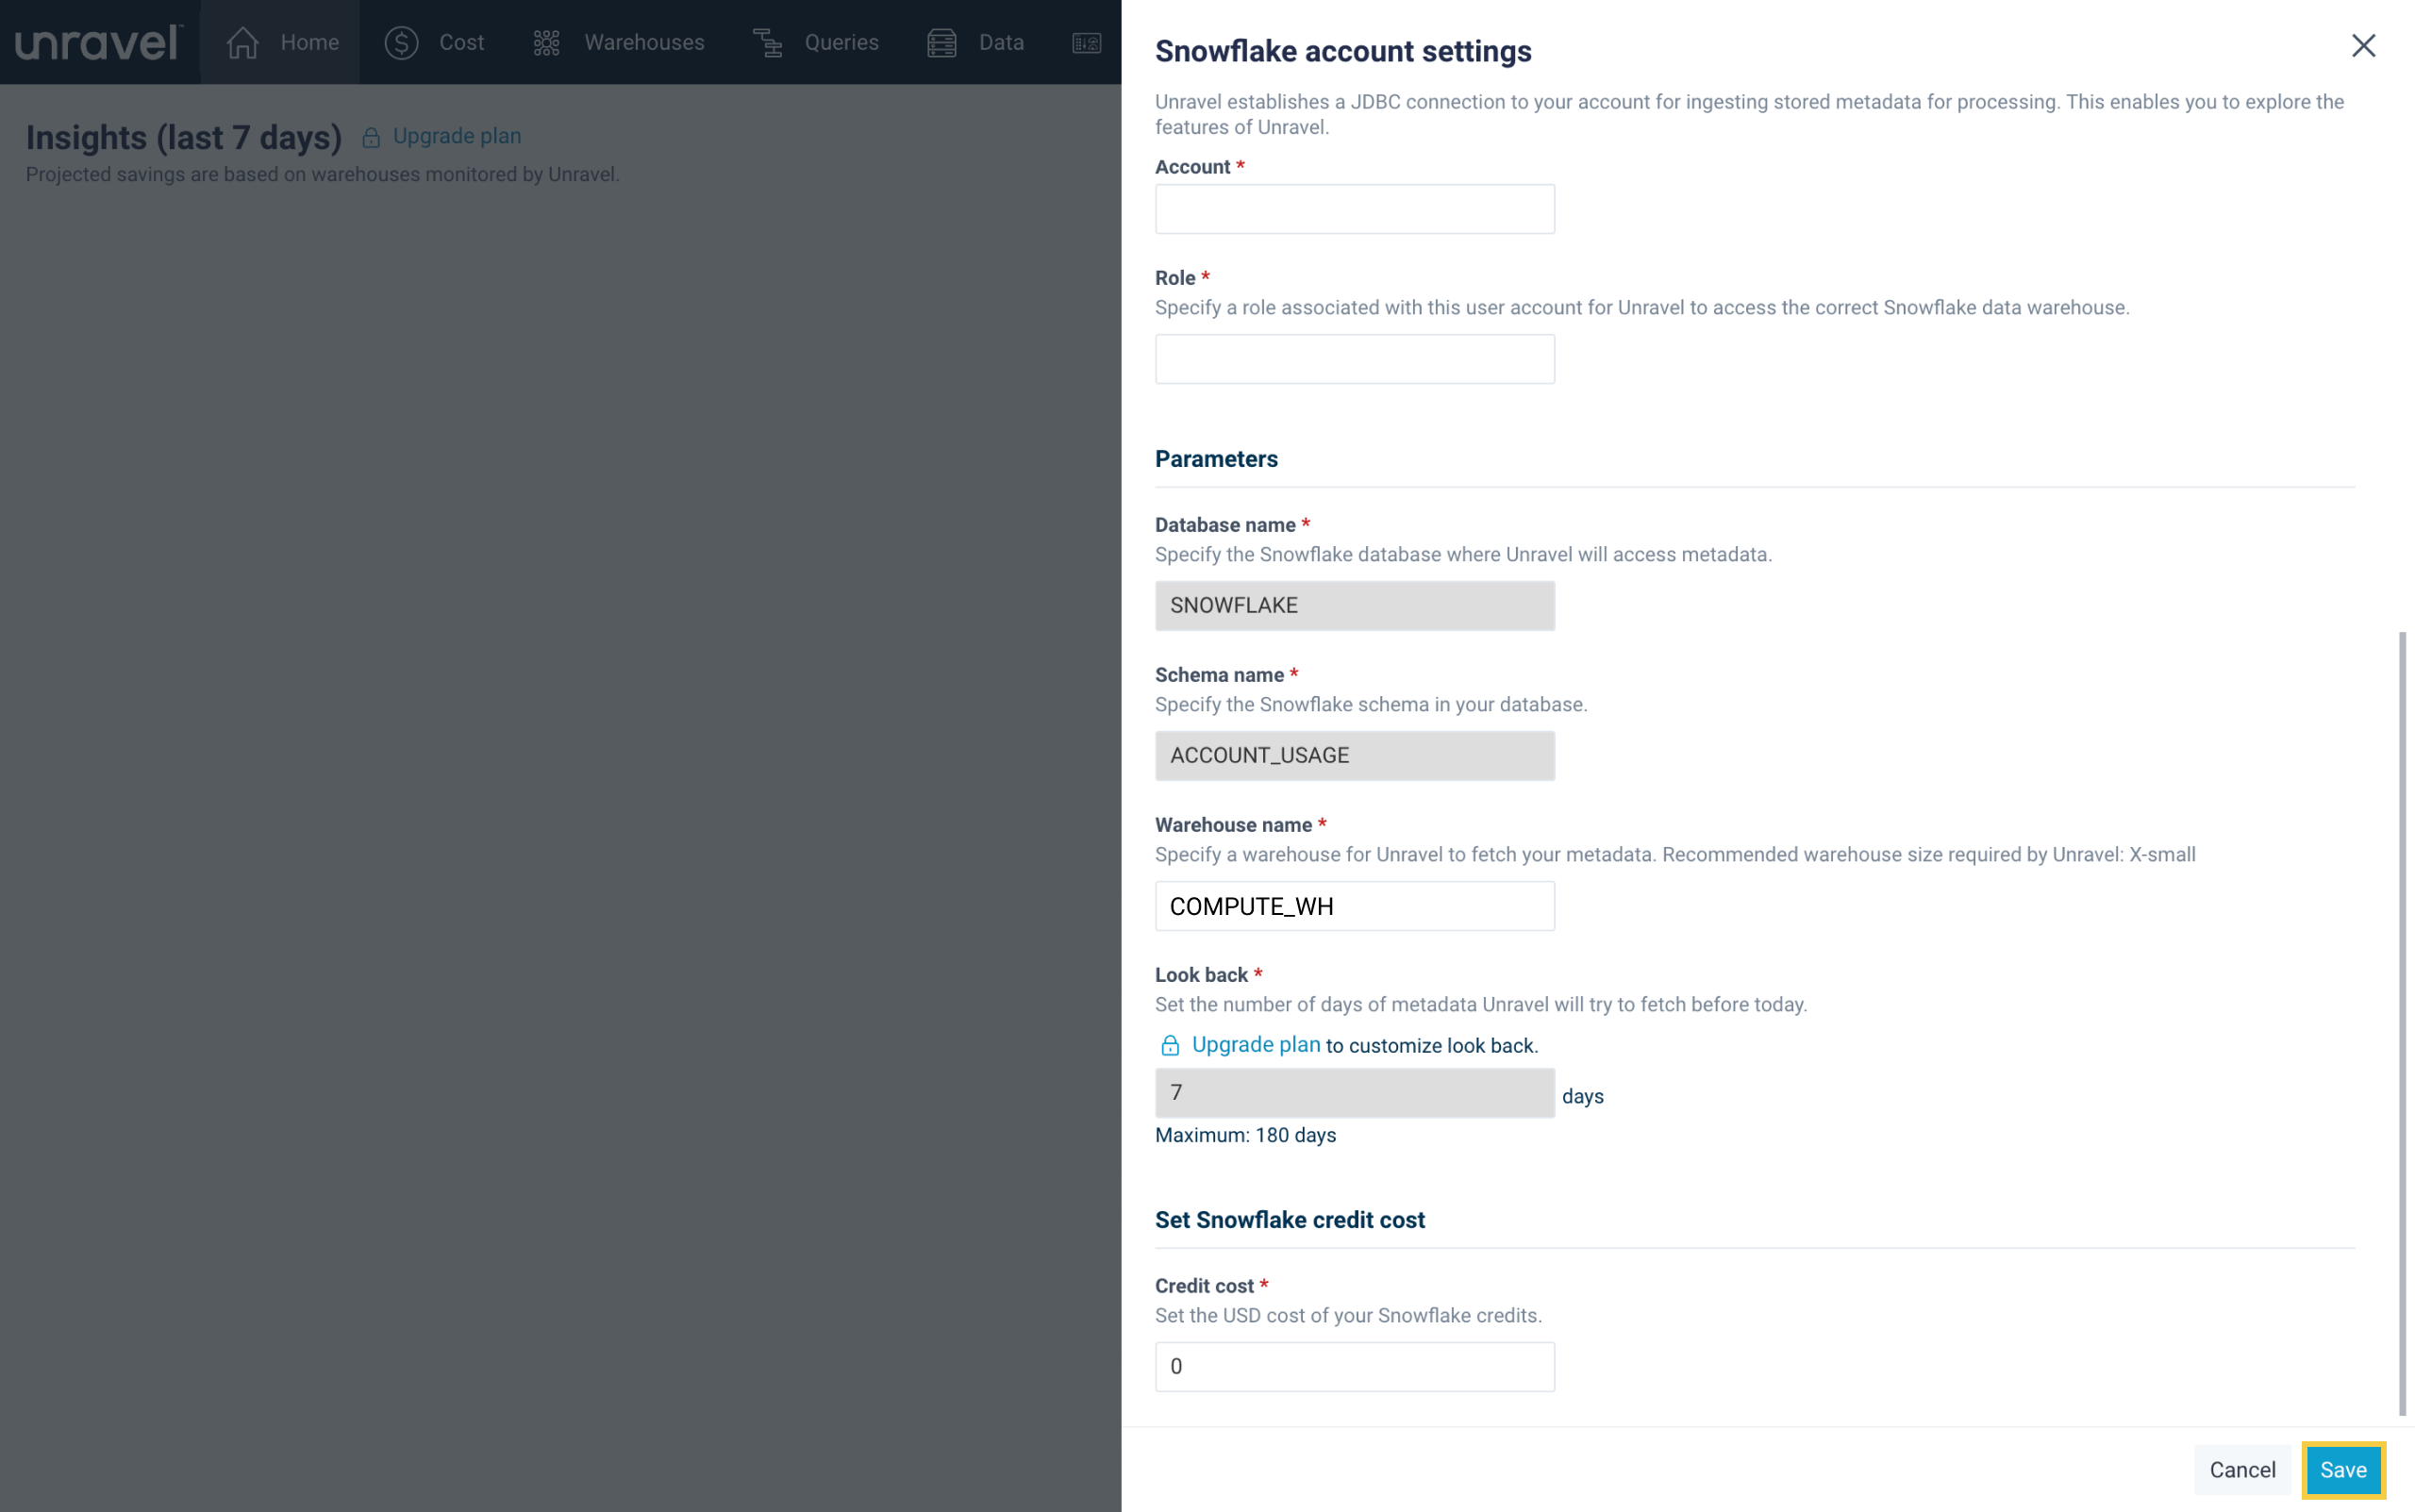
Select the Save button. Unravel will need a few minutes to add your new Snowflake account. Do not refresh this page or close this dialog box.
Congrats, your Snowflake account is now connected to Unravel.
** DO NOT REMOVE Hidden Margin Required **
** DO NOT REMOVE Hidden Margin Required **
Congrats, all done!
Now you'll start seeing Unravel's detailed visibility into Snowflake performance + usage.
Next up, take Unravel’s unique features out for a test drive. Need help? We’re here to help. Check out options below for guidance and support.